“这题我会!”。我想,看到本文标题时,这恐怕是大多数人的第一反应。尽管图片平铺并非常用功能,但多数开发者仍能轻松掌握其实现方法。通过搜索引擎查询,几乎所有结果都指向同一解决方案 —— 使用 resizable 修饰符。
然而,对于一个功能强大的 UI 框架而言,若某个需求仅有单一解决方案,显然是不够全面的。在本文中,我们将探讨两种不同的图片平铺实现方式,并由此引申出一种在 SwiftUI 中较少使用的 Image 构建方法。
resizable:最常用但未必最好用
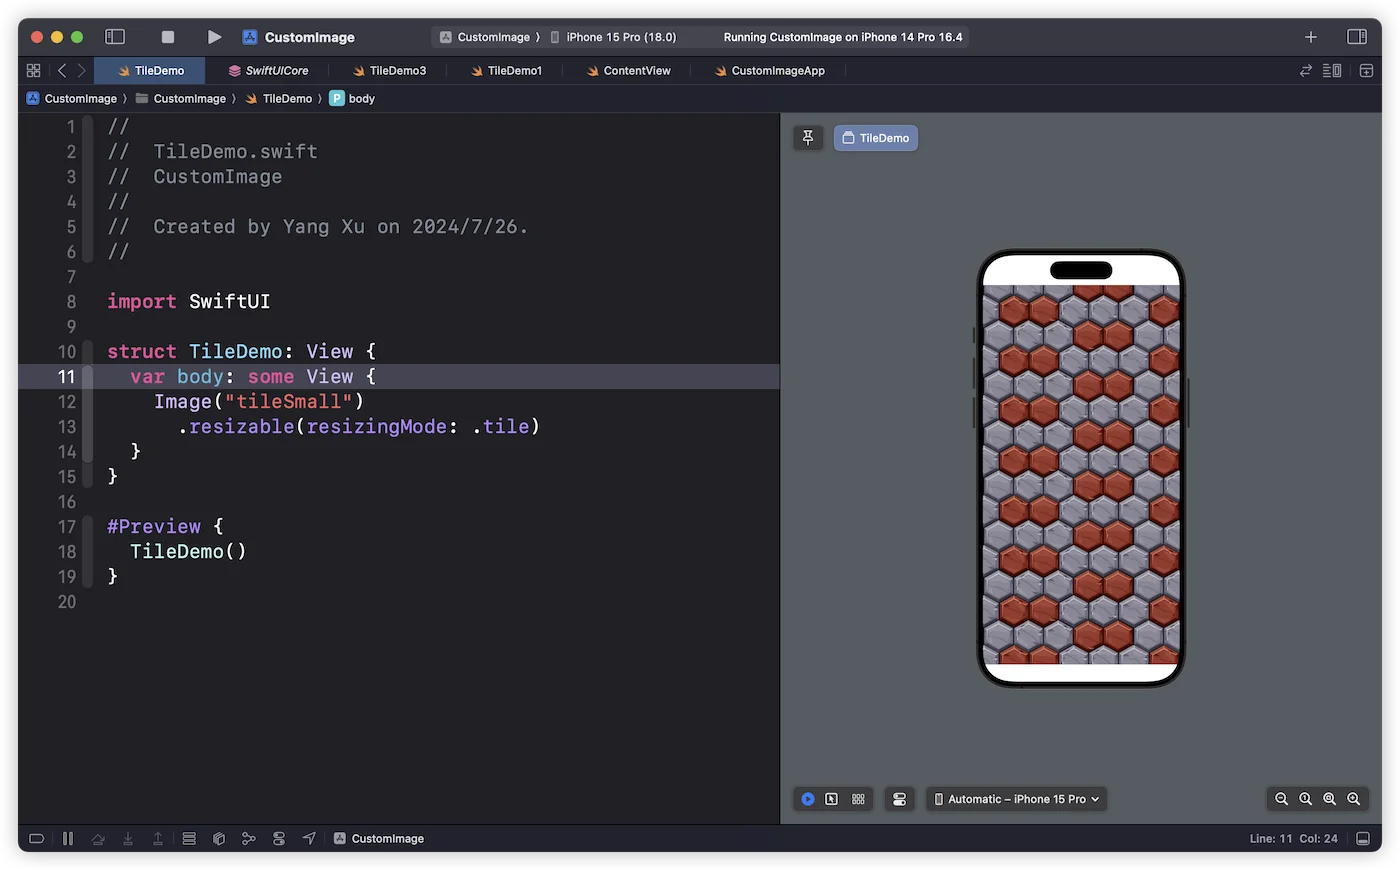
在 SwiftUI 中,resizable 修饰符用于设置图像大小调整的模式,它只能应用于 Image 类型。默认情况下,SwiftUI 使用 stretch 模式来缩放图片以填充可用空间。如果我们将模式切换为 tile,SwiftUI 将以图片原始大小在给定空间中进行平铺。
因此,通过 resizable 来平铺图片是目前使用最广泛且最为人知的方式。
struct TileDemo: View {
  var body: some View {
    Image("tileSmall")
      .resizable(resizingMode: .tile)
  }
}
尽管这种实现方式具有最佳的系统版本兼容性(支持至 iOS 13),但它也存在以下几个明显的局限性:
-
无法直接调整原始图片尺寸
由于
resizable只能应用于Image类型,如果我们想在使用该修饰符前调整图片尺寸,目前只能借助非 SwiftUI 原生的方式来实现。 -
无法仅使用原始图片的特定部分
与上述原因类似,需要使用非 SwiftUI 的方法才能通过代码来预先截取原始图片中的部分区域。
-
在非矩形区域中进行图片平铺时,需要结合
mask、clipShape等修饰符一起使用,操作不够直观。
foregroundStyle:更具 SwiftUI 风格的实现
从 iOS 15 开始,SwiftUI 引入了一个新的修饰符 foregroundStyle。它整合了原本需要通过多个修饰符(如 foregroundColor、fill、overlay 等)才能实现的操作。这个修饰符接受一个或多个符合 ShapeStyle 协议的实现作为 style,并用它来渲染被应用元素的前景。
查阅 SwiftUI 的文档,我们会发现自 iOS 13 起就提供了一个有趣的 ShapeStyle 实现 —— ImagePaint:一种通过重复图像区域来填充形状的 ShapeStyle。
这意味着,只要我们将其用作视图的前景样式,就能实现一种更符合 SwiftUI 直觉、且具备更多控制能力的图片平铺方式。
extension ShapeStyle where Self == ImagePaint {
    public static func image(_ image: Image, sourceRect: CGRect = CGRect(x: 0, y: 0, width: 1, height: 1), scale: CGFloat = 1) -> ImagePaint
}- image:用来平铺的图片
- sourceRect:用于定义绘制源图像的区域。例如:
CGRect(x: 0, y: 0, width: 1, height: 1)表示绘制整个图像;CGRect(x: 0, y: 0, width: 0.5, height: 0.5)表示绘制图像的左上四分之一部分。 - scale:原始图片的缩放比例,1 表示不进行缩放。
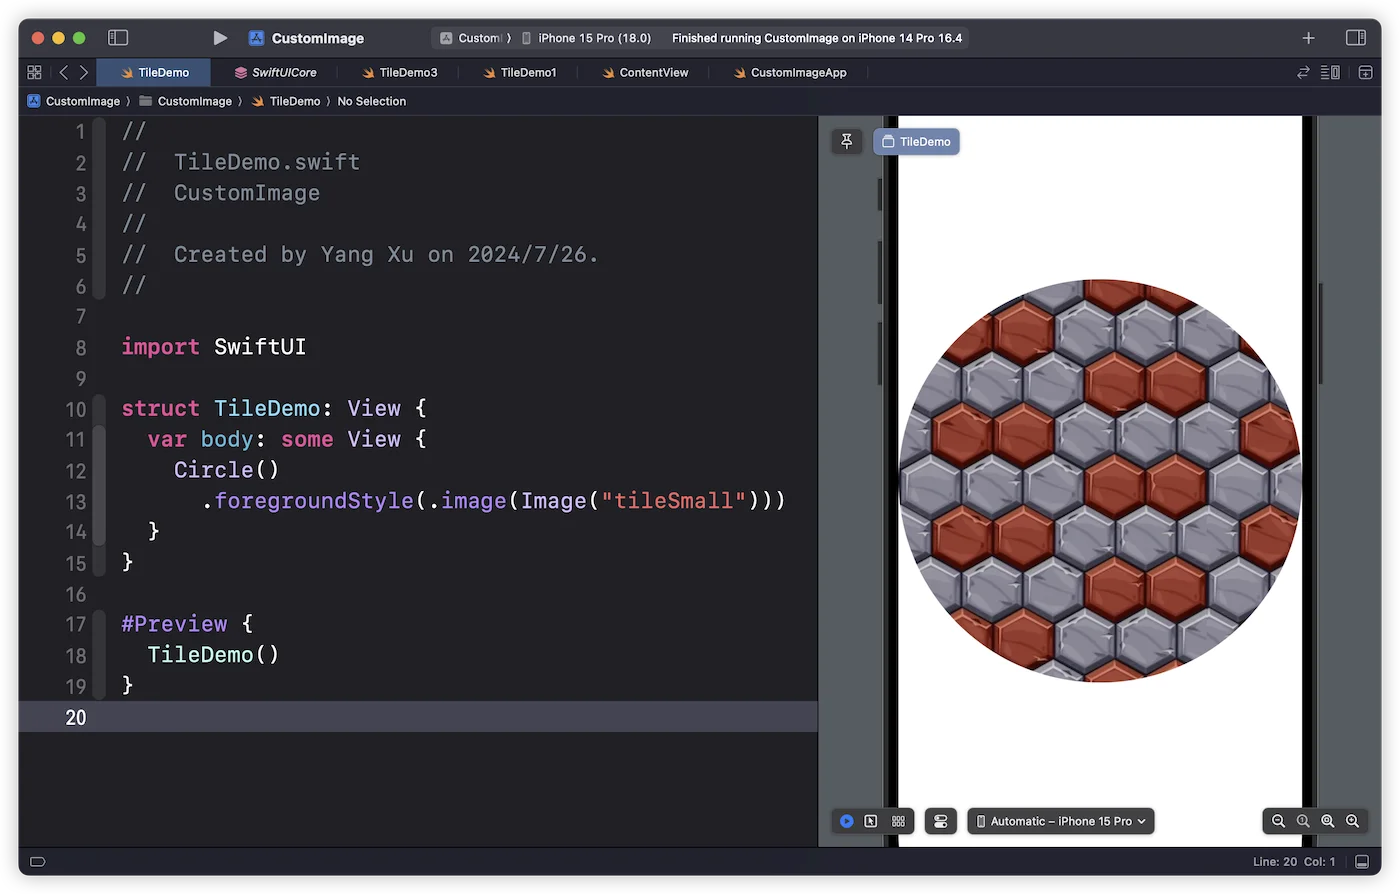
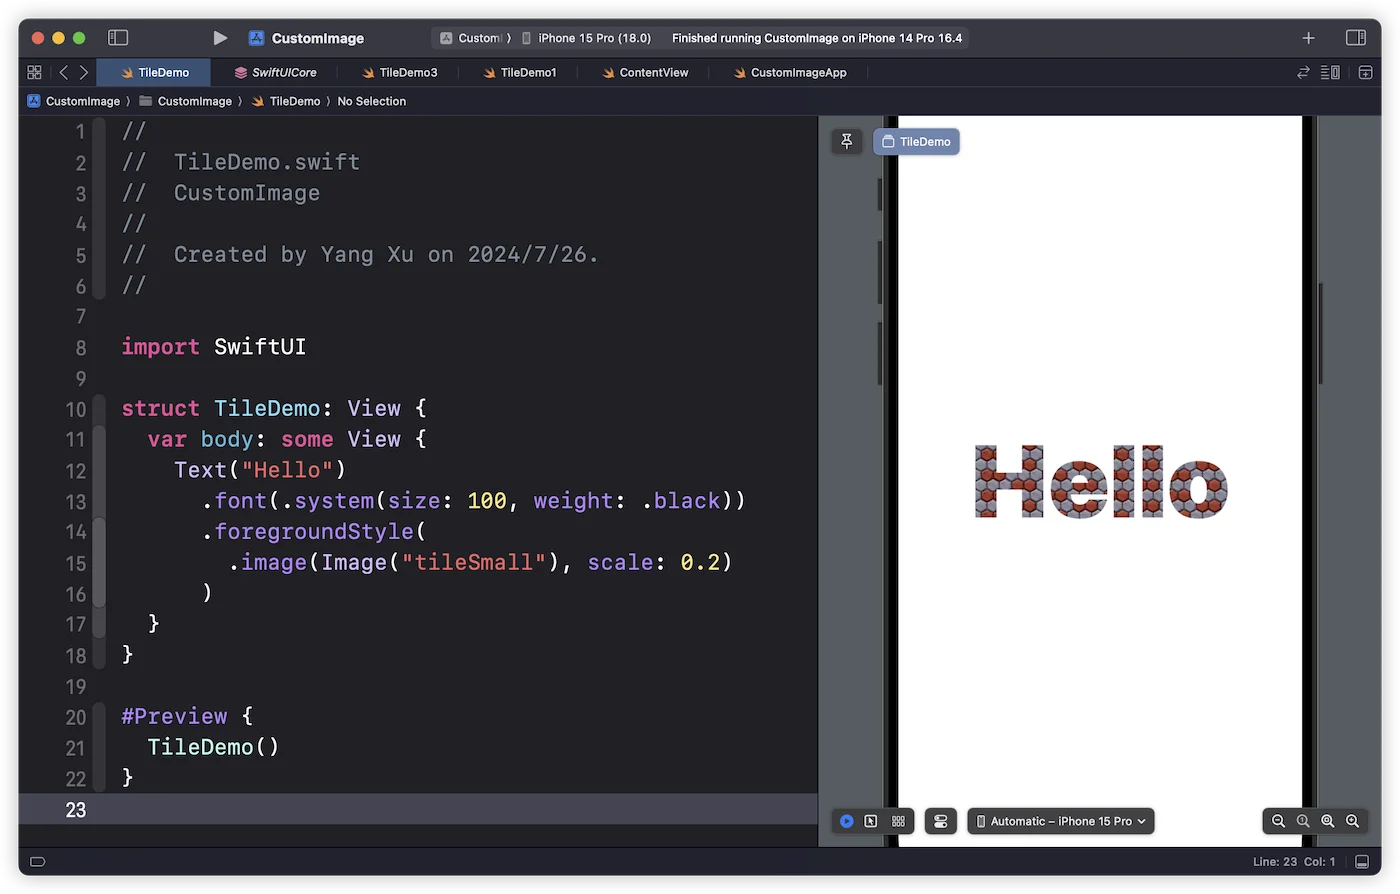
通过 foregroundStyle + ImagePaint 的方式,我们可以轻松突破 resizable 方式的限制。
struct TileDemo: View {
  var body: some View {
    Circle()
      .foregroundStyle(.image(Image("tileSmall")))
  }
}
struct TileDemo: View {
  var body: some View {
    Text("Hello")
      .font(.system(size: 100, weight: .black))
      .foregroundStyle(
        .image(Image("tileSmall"), scale: 0.2) // 缩小图片
      )
  }
}
如果你对系统兼容性比较敏感,也可以使用 fill 来进行填充,不过此时只能在 Shape 中实现图片平铺效果。
struct TileDemo: View {
  var body: some View {
    Circle()
      .fill(.image(Image("tileSmall")))
  }
}
用自定义 Image 来平铺 SF Symbol
在 SwiftUI 中,还存在另一种被广泛使用的 Image:SF Symbol。那么,我们能否直接使用它作为图像源来进行平铺呢?
Image(systemName: "heart")
   .resizable(resizingMode: .tile)
执行上面的代码,在不同的系统版本中你会看到不同的结果。在 iOS 16 中可以看到平铺效果,但在 iOS 15、17、18 中,Symbol 图片都是以拉伸的形式进行渲染的。
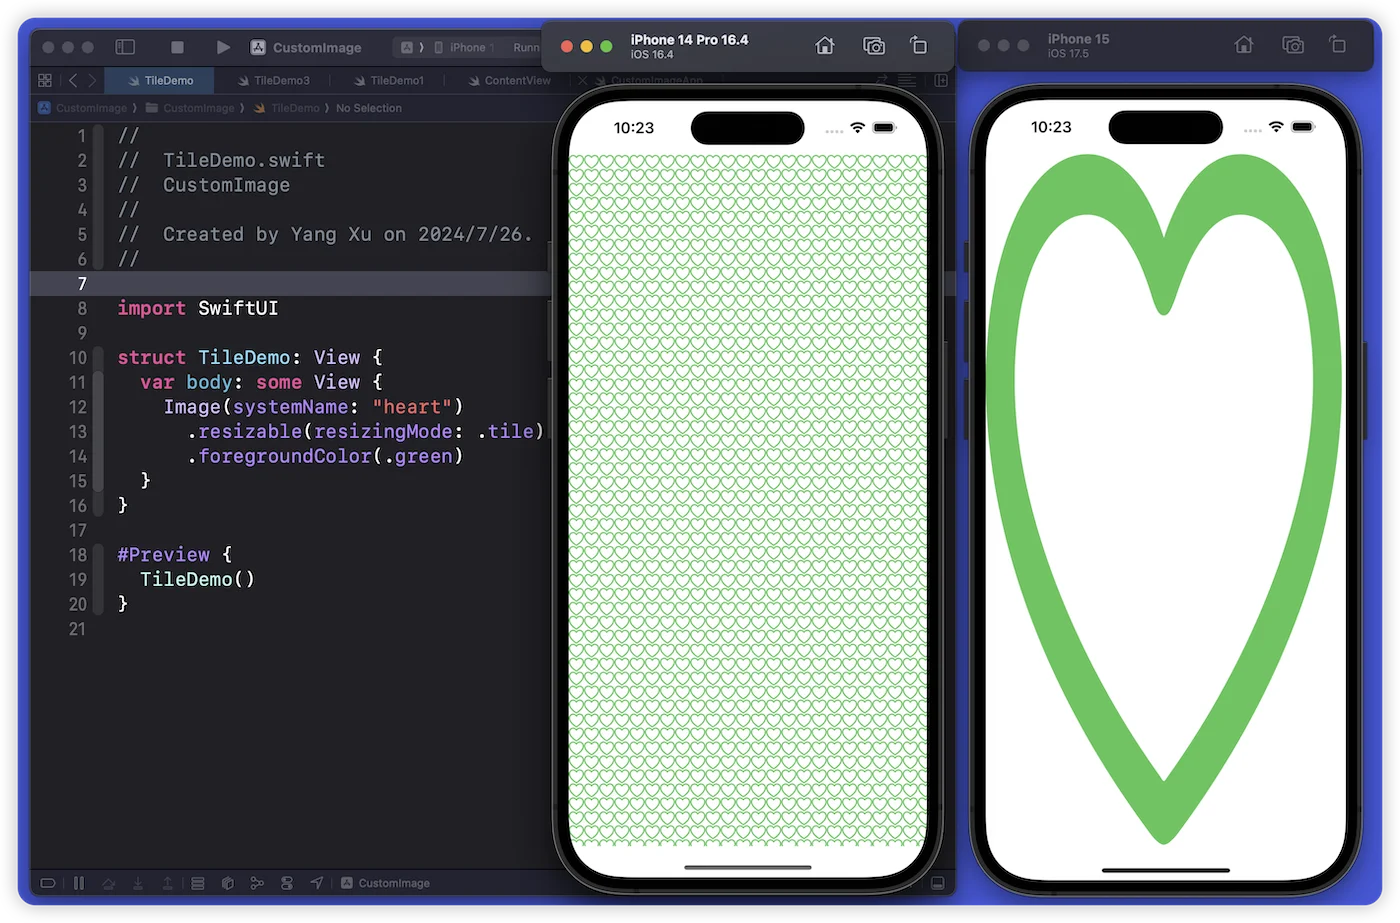
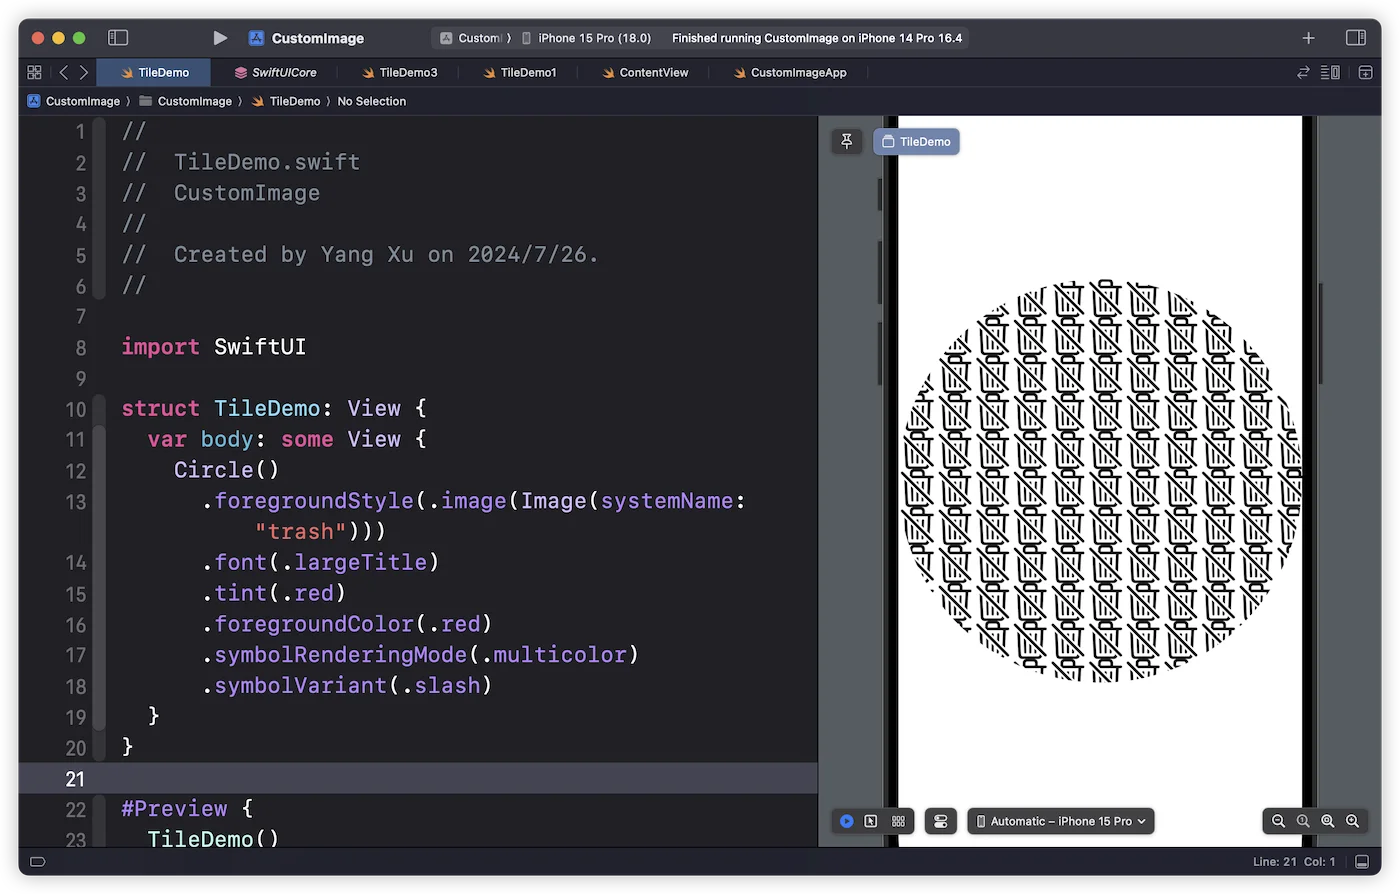
如果切换成 foregroundStyle 的方式,虽然可以看到平铺效果,但除了字号和符号变体外,其他对符号的控制(如颜色、渲染模式等)信息都将被忽略。
struct TileDemo: View {
  var body: some View {
    Circle()
      .foregroundStyle(.image(Image(systemName: "trash")))
      .font(.largeTitle)
      .tint(.red)
      .foregroundColor(.red)
      .symbolRenderingMode(.multicolor)
      .symbolVariant(.slash)
  }
}
那么,我们能否在更多的平台版本上实现对 Symbol 的平铺,同时支持所有的符号控制功能呢?
从 iOS 16 开始,SwiftUI 为 Image 提供了一个非常有趣的构造方法。通过它,我们可以直接在 GraphicsContext 上进行绘制并创建一个 Image 实例。
extension Image {
    public init(size: CGSize, label: Text? = nil, opaque: Bool = false, colorMode: ColorRenderingMode = .nonLinear, renderer: @escaping (inout GraphicsContext) -> Void)
}
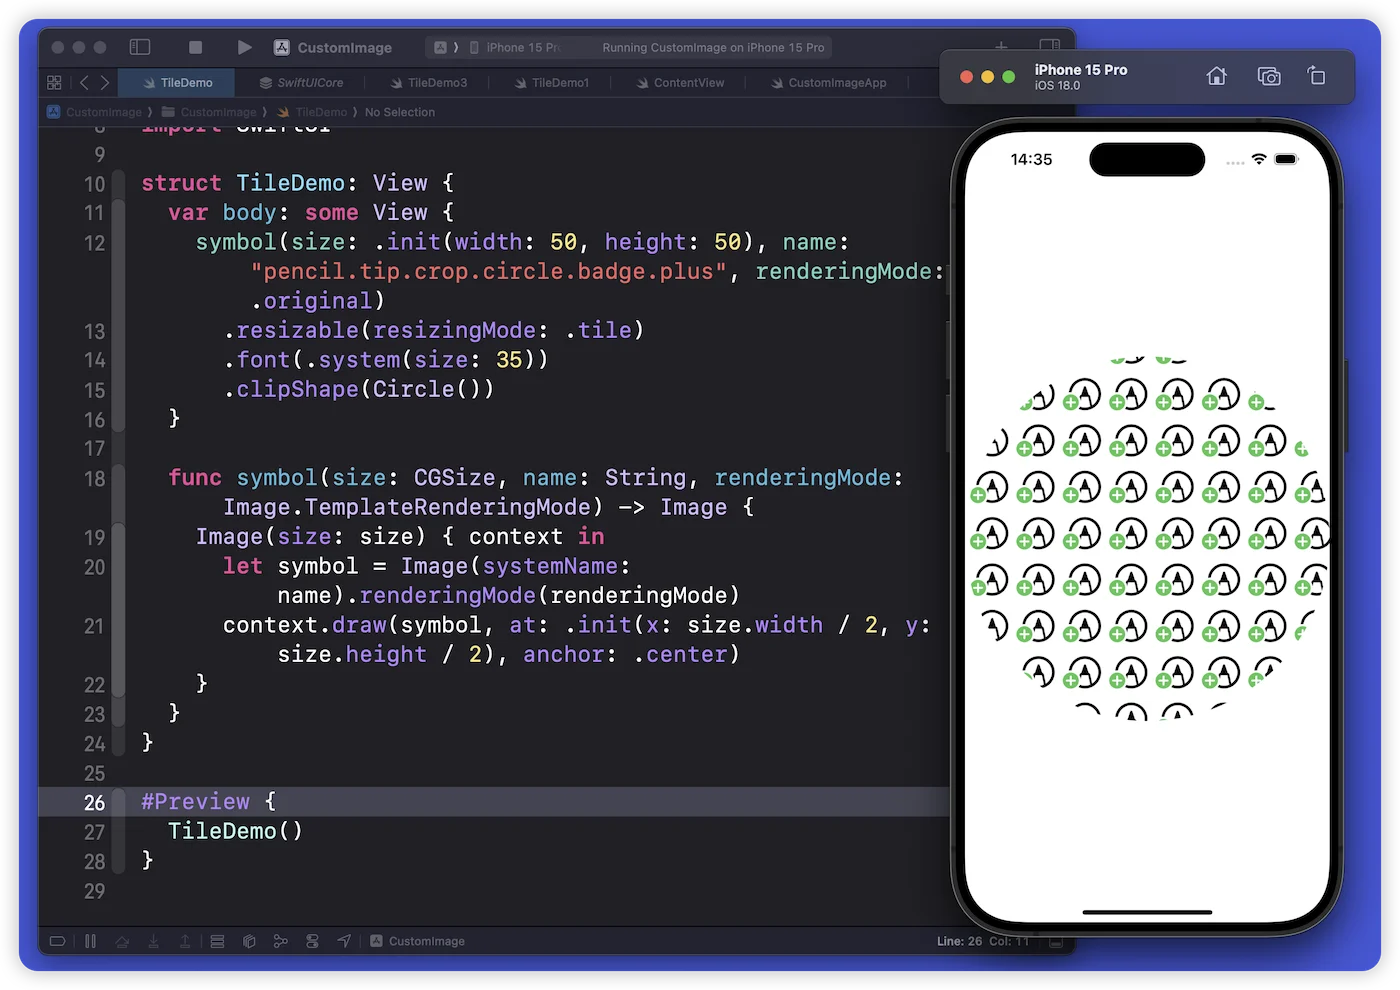
通过这个构造方法,我们可以对需要平铺的 Symbol 进行重新绘制(创建一个新的 Image 实例),从而实现具备完整控制能力的符号平铺。
struct TileDemo: View {
  var body: some View {
    symbol(size: .init(width: 50, height: 50), name: "pencil.tip.crop.circle.badge.plus", renderingMode: .original)
      .resizable(resizingMode: .tile)
      .font(.system(size: 35))
      .clipShape(Circle())
  }

  func symbol(size: CGSize, name: String, renderingMode: Image.TemplateRenderingMode) -> Image {
    Image(size: size) { context in
      let symbol = Image(systemName: name).renderingMode(renderingMode)
      context.draw(symbol, at: .init(x: size.width / 2, y: size.height / 2), anchor: .center)
    }
  }
}
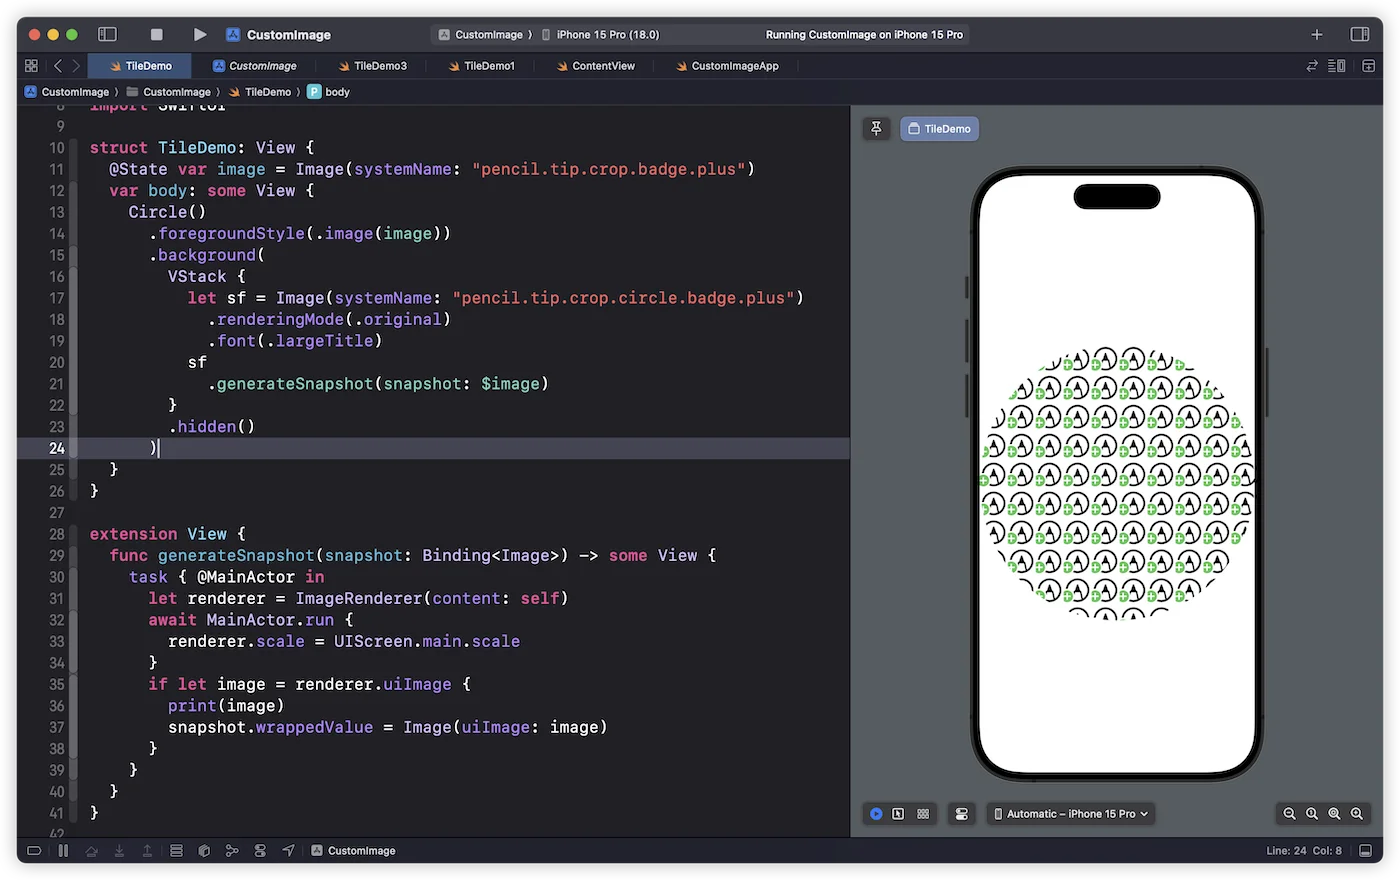
遗憾的是,通过这种方法创建的 Image 实例在 foregroundStyle + ImagePaint 中使用时会导致系统崩溃。如果仍想通过 ShapeStyle 的方式来实现平铺,就需要借助 ImageRenderer:
struct TileDemo: View {
  @State var image = Image(systemName: "pencil.tip.crop.badge.plus")
  var body: some View {
    Circle()
      .foregroundStyle(.image(image))
      .background(
        VStack {
          let sf = Image(systemName: "pencil.tip.crop.circle.badge.plus")
            .renderingMode(.original)
            .font(.largeTitle)
          sf
            .generateSnapshot(snapshot: $image)
        }
        .hidden()
      )
  }
}

extension View {
  func generateSnapshot(snapshot: Binding<Image>) -> some View {
    task { @MainActor in
      let renderer = ImageRenderer(content: self)
      await MainActor.run {
        renderer.scale = UIScreen.main.scale
      }
      if let image = renderer.uiImage {
        snapshot.wrappedValue = Image(uiImage: image)
      }
    }
  }
}
当然,如果仅想实现对 Symbol 的平铺,使用 VStack + HStack 或者 Grid 等方式都可以方便地完成。但这种自定义 Image 的方式在实际开发场景中还是有很大的应用潜力。
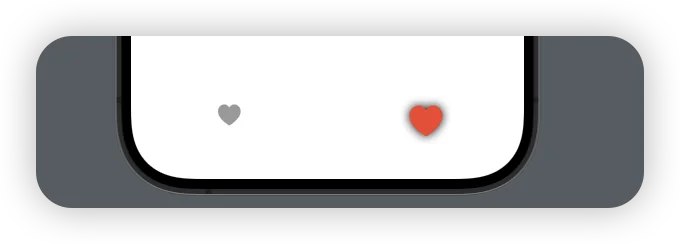
在 SwiftUI 中,有些控件会自动过滤掉开发者提供的完整声明代码,只保留其想保留的部分。例如,swipeActions 和 tabItem 只会保留 Text 和 Image 的声明和部分设置。使用自定义 Image 的方式,我们就可以动态地创建图片来实现一些特殊需求。
下面的代码将在 tabItem 中创建一个可以保留设定风格的自定义 Image:
struct TabDemo: View {
  @State var selection = 1
  var body: some View {
    TabView(selection: $selection) {
      Text("No Style")
        .tabItem {
          Image(systemName: "heart")
            .font(.largeTitle) // 不起作用
            .shadow(radius: 10) // 不起作用
        }
        .tag(1)

      Text("Custom Style")
        .tabItem {
          keepStyle(size: .init(width: 50, height: 50), name: "heart", renderingMode: .template)
            .font(.largeTitle)
            .foregroundColor(selection == 2 ? .red : .secondary.opacity(0.5))
        }
        .tag(2)
    }
  }

  func keepStyle(size: CGSize, name: String, renderingMode: Image.TemplateRenderingMode) -> Image {
    Image(size: size) { context in
      let symbol = Image(systemName: name).renderingMode(renderingMode)
      context.addFilter(.shadow(color: .black, radius: 5))
      context.draw(symbol, at: .init(x: size.width / 2, y: size.height / 2), anchor: .center)
    }
  }
}
总结
本文探讨的图片平铺技巧,无论是使用 foregroundStyle 还是自定义 Image,都展示了 SwiftUI 的潜力和灵活性。这些技巧不仅帮助我们突破框架的表面限制,更强调了持续学习 API 变化的重要性。通过掌握和运用这些新工具,开发者可以不断提升对 SwiftUI 的理解,并用原生方式拓展其能力边界。这种探索和实践的过程,正是提高 SwiftUI 应用上限的关键。