“I’ve got this!” I imagine this is the first reaction of most people upon seeing the title of this article. Although image tiling is not a commonly used feature, most developers can easily master its implementation. A search engine query reveals that almost all results point to the same solution — using the resizable modifier.
However, for a powerful UI framework, it is clearly not comprehensive to have only one solution for a requirement. In this article, we will explore two different implementations of image tiling and from there, introduce a less commonly used Image construction method in SwiftUI.
resizable: Most Common but Not Necessarily the Best
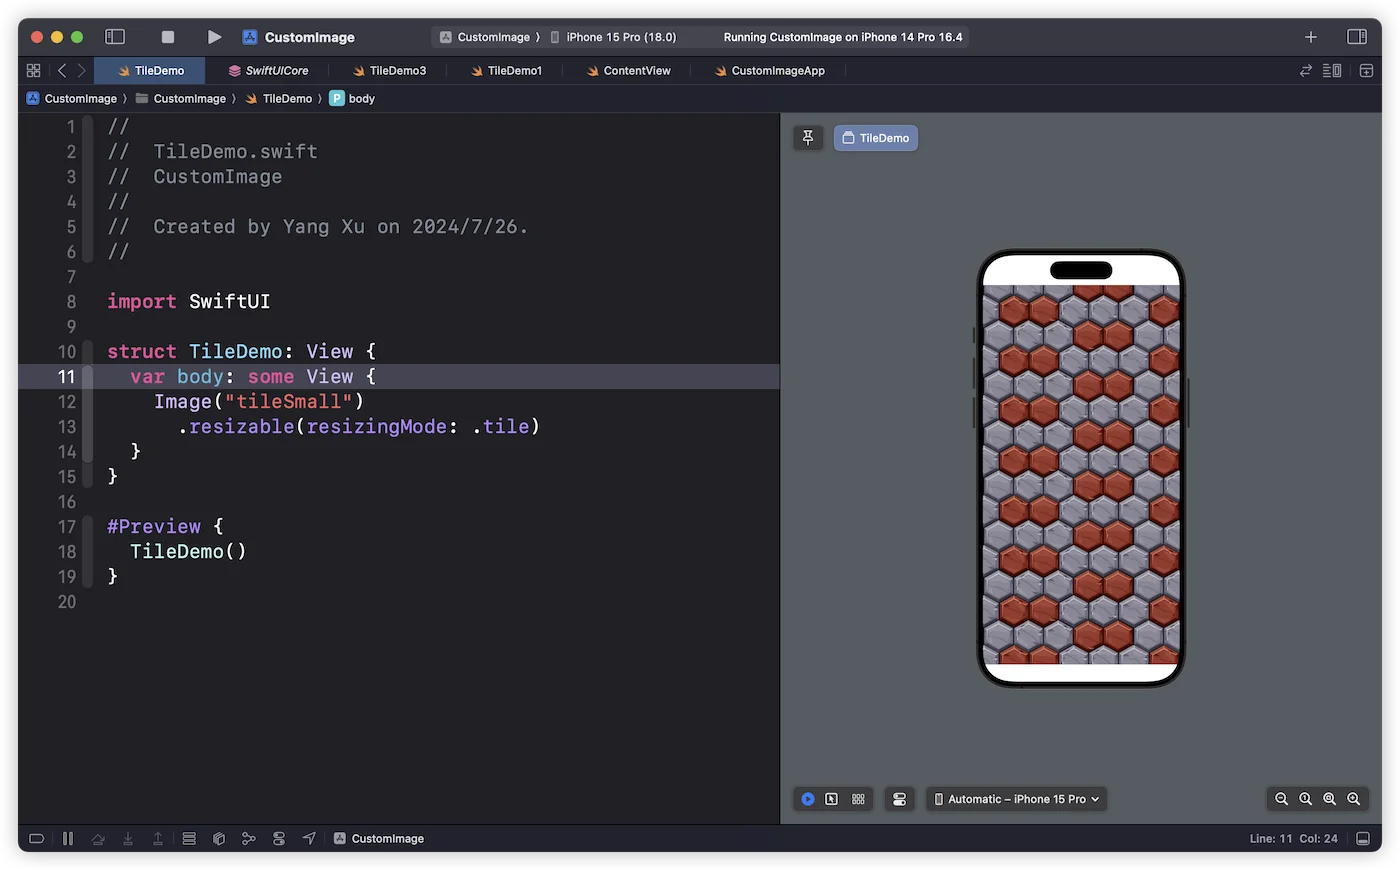
In SwiftUI, the resizable modifier is used to set the mode of image resizing and can only be applied to Image types. By default, SwiftUI uses the stretch mode to scale the image to fill the available space. If we switch the mode to tile, SwiftUI will tile the image at its original size within the given space.
Thus, using resizable to tile images is currently the most widely used and well-known method.
struct TileDemo: View {
  var body: some View {
    Image("tileSmall")
      .resizable(resizingMode: .tile)
  }
}
Although this implementation has the best system version compatibility (supports up to iOS 13), it also has several obvious limitations:
-
Cannot directly adjust the original image size
Since
resizablecan only be applied toImagetypes, if we want to adjust the image size before using this modifier, we currently can only rely on non-SwiftUI native methods. -
Cannot use only a specific part of the original image
For similar reasons, non-SwiftUI methods are needed to pre-cut a specific area of the original image through code.
-
When tiling images in non-rectangular areas, it requires the use of modifiers like
maskandclipShape, making operations less intuitive.
foregroundStyle: A More SwiftUI-Styled Implementation
Starting with iOS 15, SwiftUI introduced a new modifier called foregroundStyle. It integrates operations that previously required multiple modifiers such as foregroundColor, fill, overlay, etc. This modifier accepts one or more implementations conforming to the ShapeStyle protocol as style and uses it to render the foreground of the applied element.
Consulting the SwiftUI documentation, we find that since iOS 13, an interesting ShapeStyle implementation called ImagePaint has been available: a ShapeStyle that fills shapes by repeating an image area.
This means that by using it as the foreground style of the view, we can implement a more intuitive and controllable method of image tiling in SwiftUI.
extension ShapeStyle where Self == ImagePaint {
    public static func image(_ image: Image, sourceRect: CGRect = CGRect(x: 0, y: 0, width: 1, height: 1), scale: CGFloat = 1) -> ImagePaint
}- image: The image to tile
- sourceRect: Defines the area of the source image to draw. For example,
CGRect(x: 0, y: 0, width: 1, height 1)means to draw the entire image;CGRect(x: 0, y: 0, width: 0.5, height 0.5)means to draw the top left quarter of the image. - scale: The scale of the original image, with 1 meaning no scaling.
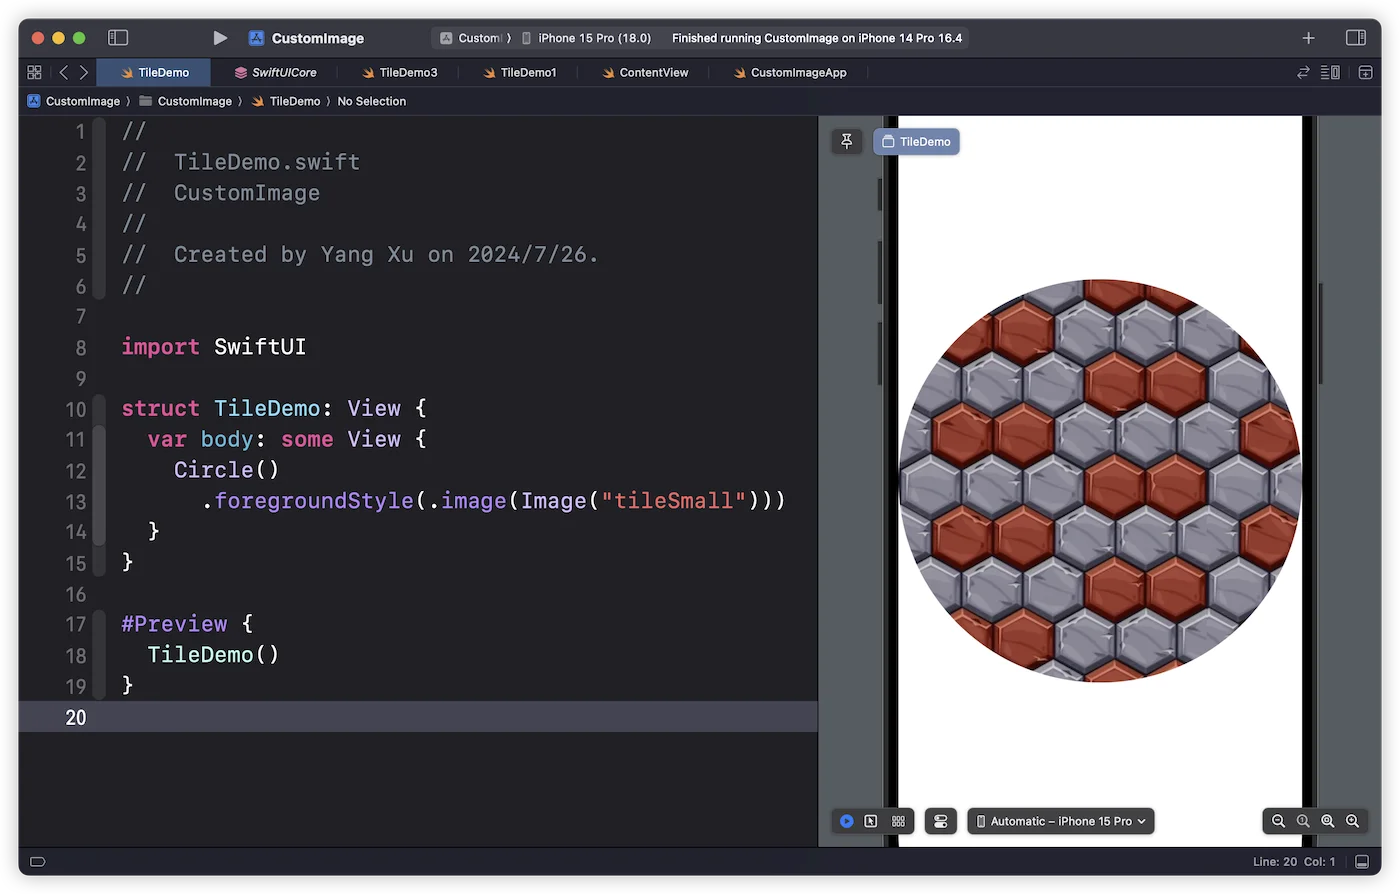
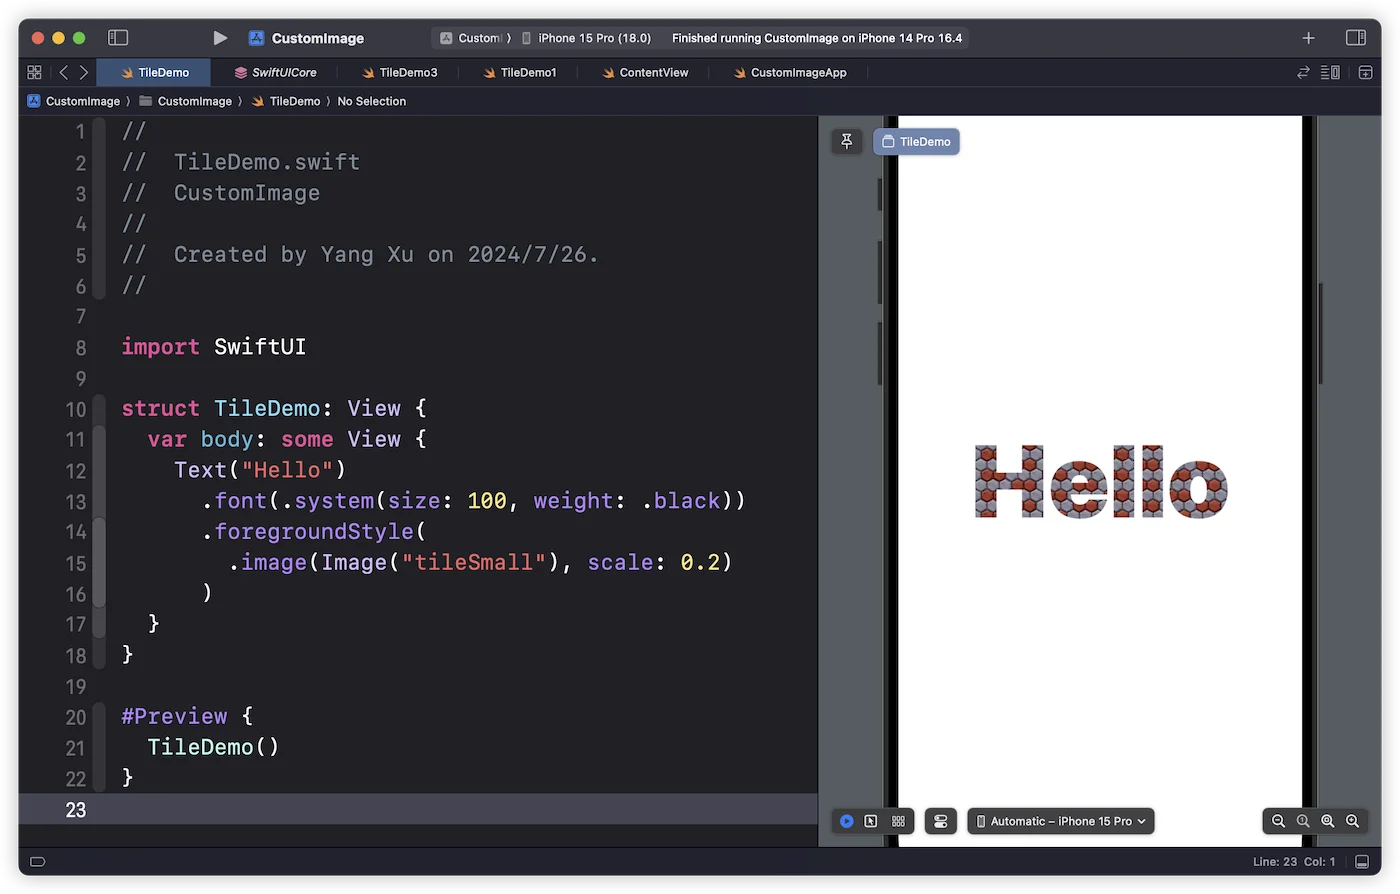
Using foregroundStyle + ImagePaint, we can easily break the limitations of the resizable method.
struct TileDemo: View {
  var body: some View {
    Circle()
      .foregroundStyle(.image(Image("tileSmall")))
  }
}
struct TileDemo: View {
  var body: some View {
    Text("Hello")
      .font(.system(size: 100, weight: .black))
      .foregroundStyle(
        .image(Image("tileSmall"), scale: 0.2) // Scale down the image
      )
  }
}
If you are sensitive to system compatibility, you can also use fill to fill the area, but this can only be implemented in Shape.
struct TileDemo: View {
  var body: some View {
    Circle()
      .fill(.image(Image("tileSmall")))
  }
}
Custom Image for Tiling SF Symbols
In SwiftUI, there is another widely used Image: the SF Symbol. Can we directly use it as an image source for tiling?
Image(systemName: "heart")
   .resizable(resizingMode: .tile)
Running the above code, you will see different results across system versions. In iOS 16, you can see the tiling effect, but in iOS 15, 17, and 18, the Symbol images are rendered stretched.
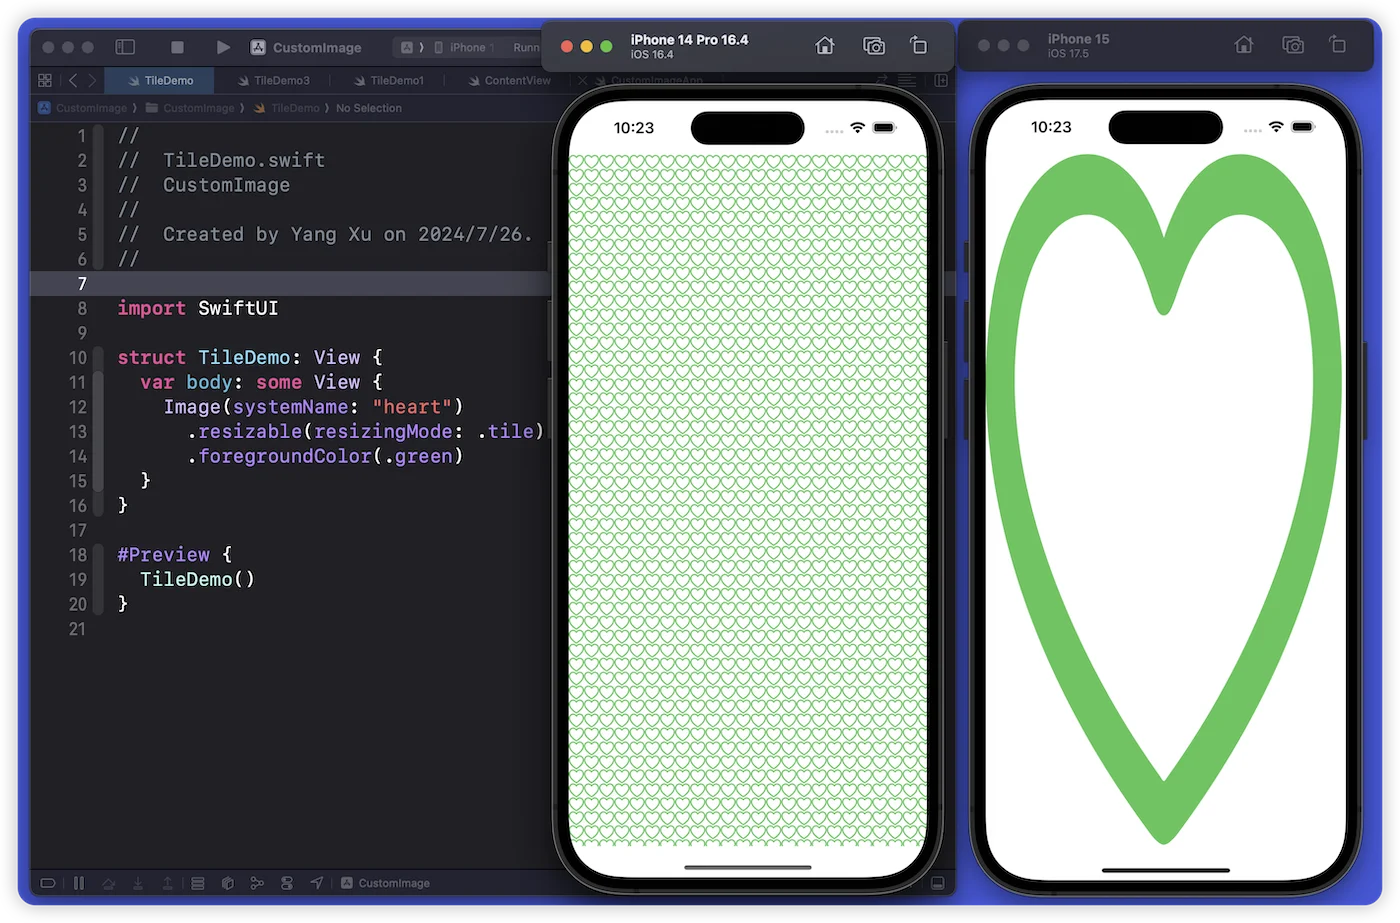
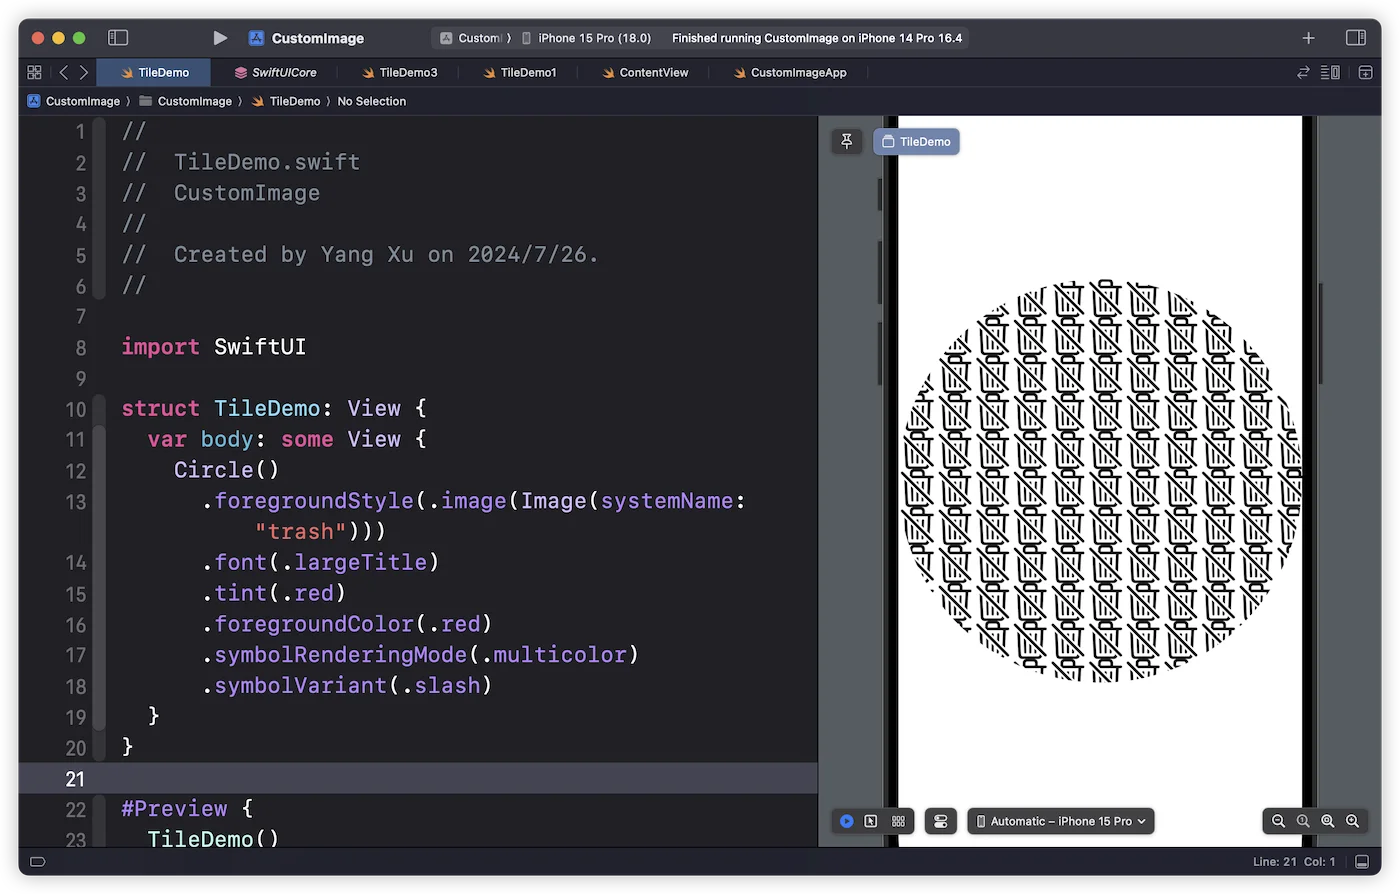
If switched to the foregroundStyle method, although you can see the tiling effect, other controls over the symbol (such as color, rendering mode, etc.) except for font size and symbol variants are ignored.
struct TileDemo: View {
  var body: some View {
    Circle()
      .foregroundStyle(.image(Image(systemName: "trash")))
      .font(.largeTitle)
      .tint(.red)
      .foregroundColor(.red)
      .symbolRenderingMode(.multicolor)
      .symbolVariant(.slash)
  }
}
So, can we implement tiling of Symbols across more platform versions while supporting all symbol control features?
Starting with iOS 16, SwiftUI offers a very interesting constructor for Image. With it, we can directly draw on the GraphicsContext and create an Image instance.
extension Image {
    public init(size: CGSize, label: Text? = nil, opaque: Bool = false, colorMode: ColorRenderingMode = .nonLinear, renderer: @escaping (inout GraphicsContext) -> Void)
}
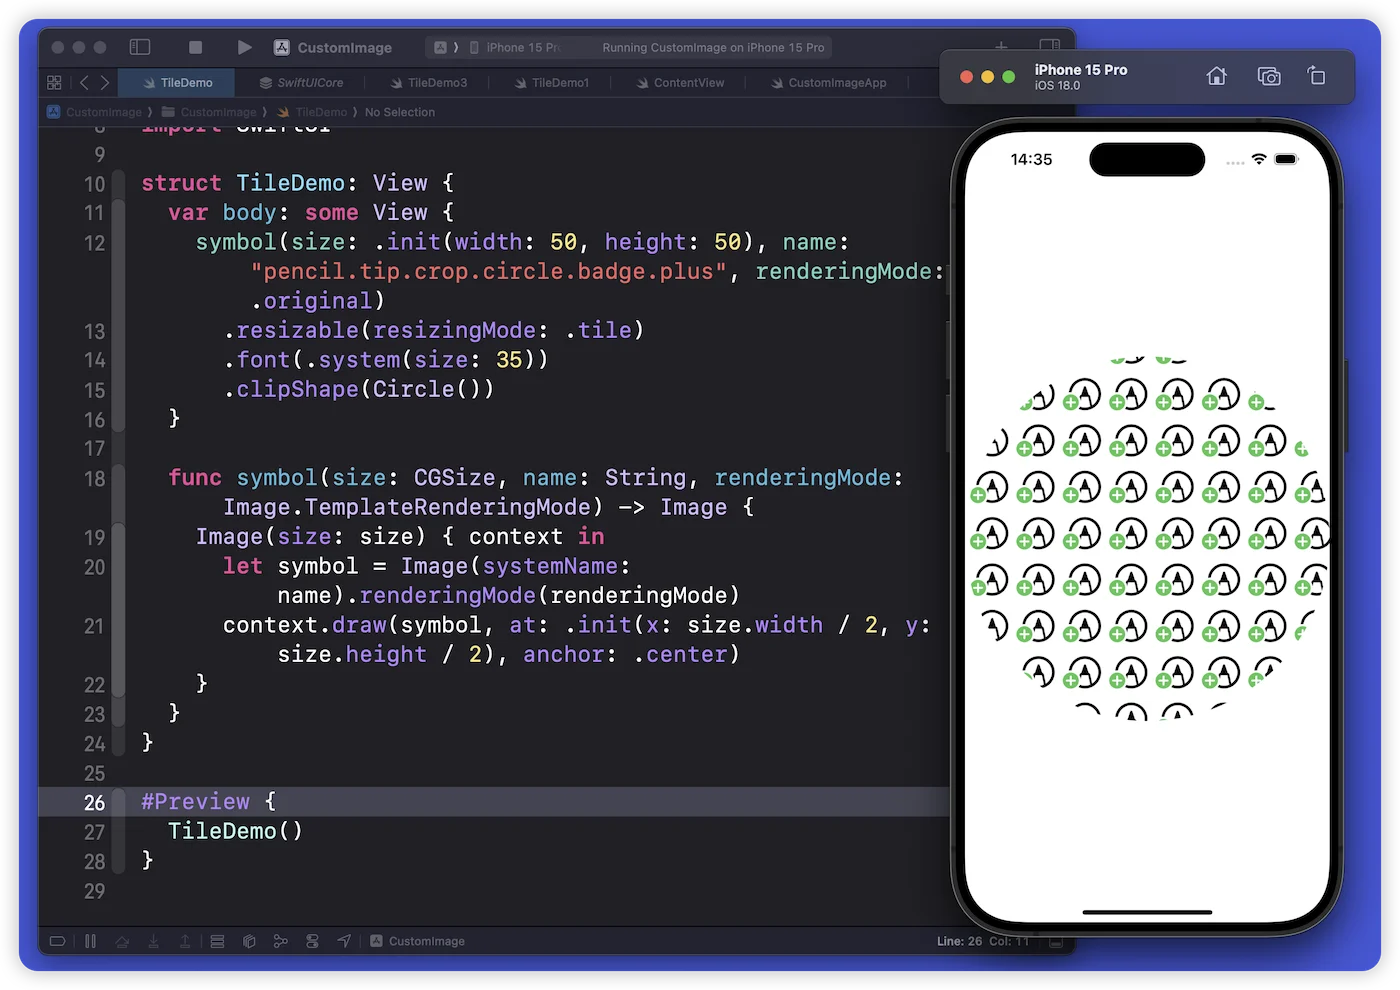
Using this constructor, we can redraw the necessary Symbol (creating a new Image instance), thereby achieving fully controllable symbol tiling.
struct TileDemo: View {
  var body: some View {
    symbol(size: .init(width: 50, height: 50), name: "pencil.tip.crop.circle.badge.plus", renderingMode: .original)
      .resizable(resizingMode: .tile)
      .font(.system(size: 35))
      .clipShape(Circle())
  }

  func symbol(size: CGSize, name: String, renderingMode: Image.TemplateRenderingMode) -> Image {
    Image(size: size) { context in
      let symbol = Image(systemName: name).renderingMode(renderingMode)
      context.draw(symbol, at: .init(x: size.width / 2, y: size.height / 2), anchor: .center)
    }
  }
}
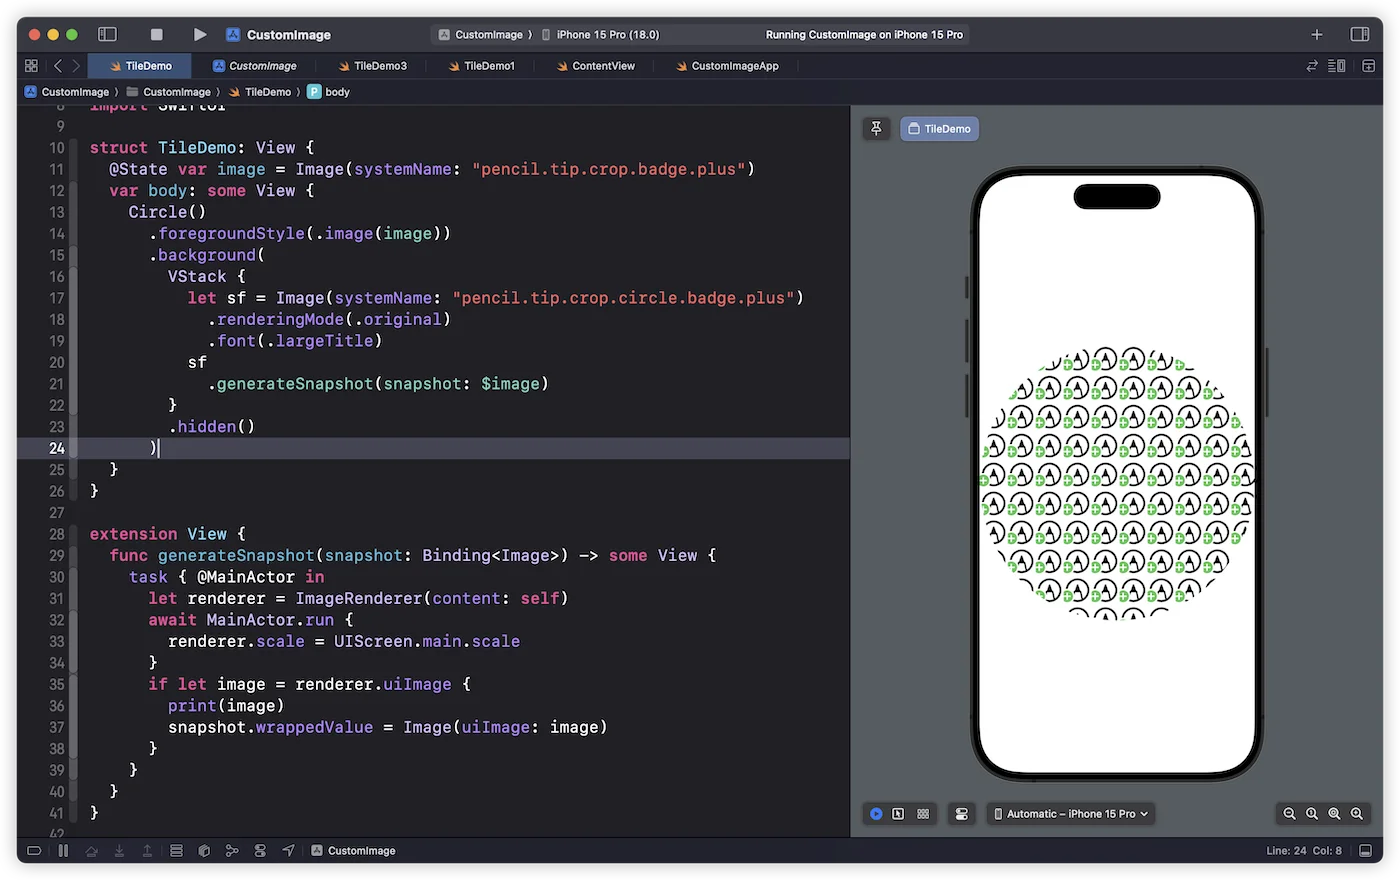
Unfortunately, using this method to create an Image instance in foregroundStyle + ImagePaint results in system crashes. If you still want to implement tiling through ShapeStyle, you’ll need to use ImageRenderer:
struct TileDemo: View {
  @State var image = Image(systemName: "pencil.tip.crop.badge.plus")
  var body: some View {
    Circle()
      .foregroundStyle(.image(image))
      .background(
        VStack {
          let sf = Image(systemName: "pencil.tip.crop.circle.badge.plus")
            .renderingMode(.original)
            .font(.largeTitle)
          sf
            .generateSnapshot(snapshot: $image)
        }
        .hidden()
      )
  }
}

extension View {
  func generateSnapshot(snapshot: Binding<Image>) -> some View {
    task { @MainActor in
      let renderer = ImageRenderer(content: this)
      await MainActor.run {
        renderer.scale = UIScreen.main.scale
      }
      if let image = renderer.uiImage {
        snapshot.wrappedValue = Image(uiImage: image)
      }
    }
  }
}
Of course, if you only want to implement tiling of Symbols, using VStack + HStack or Grid and other methods can easily accomplish this. However, this custom Image approach has great potential in actual development scenarios.
In SwiftUI, some controls automatically filter out the complete declaration code provided by developers, retaining only the parts they want to keep. For example, swipeActions and tabItem will only retain the declarations and some settings of Text and Image. By using the custom Image method, we can dynamically create images to meet some special needs.
The following code will create a custom Image in tabItem that can retain the set style:
struct TabDemo: View {
  @State var selection = 1
  var body: some View {
    TabView(selection: $selection) {
      Text("No Style")
        .tabItem {
          Image(systemName: "heart")
            .font(.largeTitle) // Does not take effect
            .shadow(radius: 10) // Does not take effect
        }
        .tag(1)

      Text("Custom Style")
        .tabItem {
          keepStyle(size: .init(width: 50, height: 50), name: "heart", renderingMode: .template)
            .font(.largeTitle)
            .foregroundColor(selection == 2 ? .red : .secondary.opacity(0.5))
        }
        .tag(2)
    }
  }

  func keepStyle(size: CGSize, name: String, renderingMode: Image.TemplateRenderingMode) -> Image {
    Image(size: size) { context in
      let symbol = Image(systemName: name).renderingMode(renderingMode)
      context.addFilter(.shadow(color: .black, radius: 5))
      context.draw(symbol, at: .init(x: size.width / 2, y: size.height / 2), anchor: .center)
    }
  }
}
Conclusion
The image tiling techniques discussed in this article, whether using foregroundStyle or custom Image, showcase the potential and flexibility of SwiftUI. These techniques not only help us break through the superficial limitations of the framework but also emphasize the importance of continuously learning API changes. By mastering and using these new tools, developers can continuously improve their understanding of SwiftUI and expand its capabilities natively. This process of exploration and practice is key to enhancing the application limits of SwiftUI.