In this article, we will explore how to implement an enhanced version of a new feature in SwiftUI 3.0, interactiveDismissDisabled, and how to create more SwiftUI-like functional extensions.
Requirements
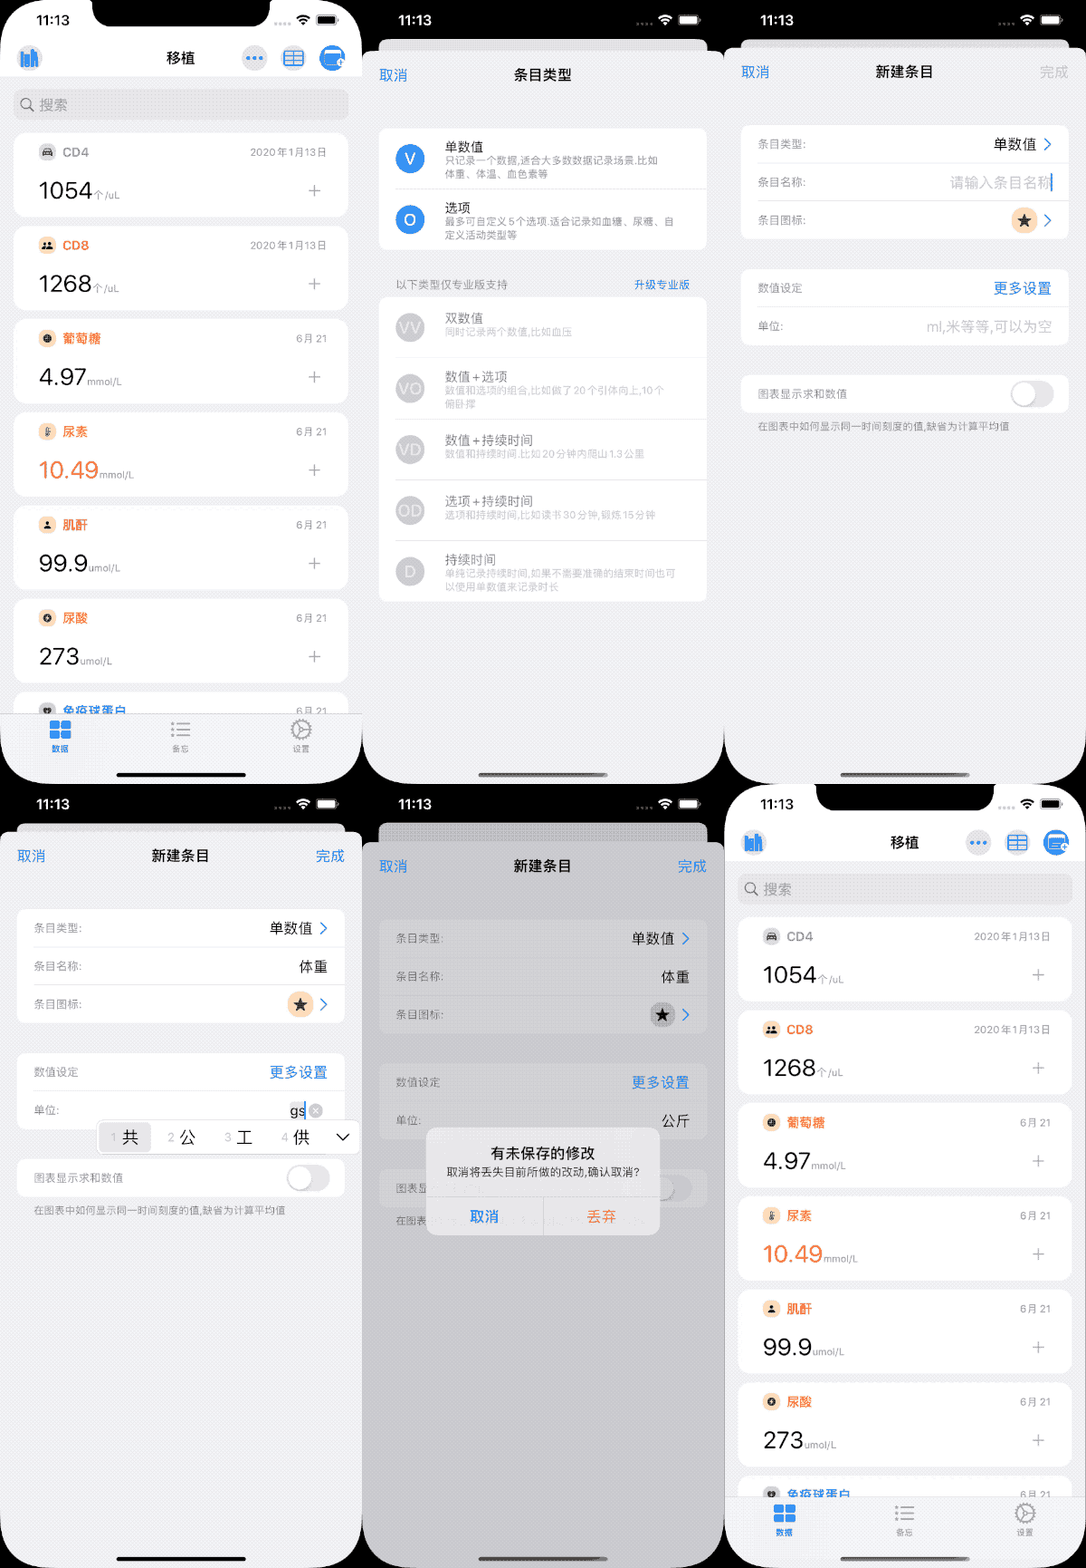
Since data entry in Health Notes is done in a Sheet, to prevent users from losing data due to accidental operations (using gestures to cancel the Sheet), I have been using various means to strengthen control over the Sheet since the earliest version.
In September last year, I introduced the Sheet control implementation method for Health Notes in the article Creating a Sheet in SwiftUI with Controllable Cancel Gestures. The goals were:
- To control whether the gesture can cancel the Sheet through code
- To receive notifications when the user uses the gesture to cancel the Sheet, thereby having more control
The final effect achieved is as follows:

When the user has unsaved data, gesture cancellation of the Sheet will be prevented, and the user must explicitly choose to save or discard the data.
The final effect fully met my requirements, but the only regret is that it is not so intuitive to use (for specific usage, please see the original article).
In this year’s SwiftUI 3.0 version, Apple added a new View extension: interactiveDismissDisabled, which fulfills the first requirement above - controlling whether the gesture can cancel the Sheet through code.
struct ExampleView: View {
       @State private var show: Bool = false

       var body: some View {

           Button("Open Sheet") {
               self.show = true
           }
           .sheet(isPresented: $show) {
               print("finished!")
           } content: {
               MySheet()
           }
       }
   }

   struct MySheet: View {
       @Environment (\.presentationMode) var presentationMode
       @State var disable = false
       var body: some View {
           Button("Close") {
               self.presentationMode.wrappedValue.dismiss()
           }
           .interactiveDismissDisabled(disable)
       }
   }
You just need to add interactiveDismissDisabled to the controlled view, without affecting the logic of other parts of the code. This implementation is what I like and also gave me a lot of inspiration.
In the article Reflections on WWDC 2021, we have already explored how SwiftUI 3.0 will affect the thinking and implementation methods of many third-party developers writing SwiftUI extensions.
Although the implementation of interactiveDismissDisabled is elegant, it still does not complete the second function needed by Health Notes: receiving notifications when the user uses the gesture to cancel the Sheet, thereby having more control. Therefore, I decided to implement it in a similar way.
Principle
Delegation
Starting with iOS 13, Apple adjusted the modal view’s delegate protocol (UIAdaptivePresentationControllerDelegate). Among them:
-
presentationControllerShouldDismiss (_ presentationController: UIPresentationController) -> Bool
Decides whether to allow the sheet to be dismissed by a gesture
-
presentationControllerWillDismiss (_ presentationController: UIPresentationController)
This method is executed when the user tries to cancel using a gesture
When the user uses a gesture to cancel the Sheet, the system first executes presentationControllerWillDismiss, and then obtains from presentationControllerShouldDismiss whether to allow cancellation.
By default, the view controller (UIViewController) that presents (presents) the Sheet does not have a delegate set. Therefore, simply injecting the defined delegate instance into the view for a specific view controller can achieve the above requirements.
Injection
Create an empty UIView (through UIViewRepresentable) and find the UIViewController A that holds it. Then the presentationController of A is the view controller we need to inject the delegate into.
In the previous version, notifications when the user uses a gesture to cancel and other logic were separate, which was not only cumbersome but also affected the look of the code. This issue will be resolved altogether this time.
Implementation
Delegate
final class SheetDelegate: NSObject, UIAdaptivePresentationControllerDelegate {
    var isDisable: Bool
    @Binding var attemptToDismiss: UUID

    init(_ isDisable: Bool, attemptToDismiss: Binding<UUID> = .constant(UUID())) {
        self.isDisable = isDisable
        _attemptToDismiss = attemptToDismiss
    }

    func presentationControllerShouldDismiss(_ presentationController: UIPresentationController) -> Bool {
        !isDisable
    }

    func presentationControllerDidAttemptToDismiss(_ presentationController: UIPresentationController) {
        attemptToDismiss = UUID()
    }
}
UIViewRepresentable
struct SetSheetDelegate: UIViewRepresentable {
    let delegate: SheetDelegate

    init(isDisable: Bool, attemptToDismiss: Binding<UUID>) {
        self.delegate = SheetDelegate(isDisable, attemptToDismiss: attemptToDismiss)
    }

    func makeUIView(context: Context) -> some UIView {
        let view = UIView()
        return view
    }

    func updateUIView(_ uiView: UIViewType, context: Context) {
        DispatchQueue.main.async {
            uiView.parentViewController?.presentationController?.delegate = delegate
        }
    }
}
In makeUIView, you only need to create an empty UIView. Since it’s not guaranteed that the view in the Sheet is already properly displayed when executing makeUIView, the best time for injection is in updateUIView.
To facilitate finding the UIViewController that holds this UIView, we need to extend UIView:
extension UIView {
    var parentViewController: UIViewController? {
        var parentResponder: UIResponder? = self.next
        while parentResponder != nil {
            if let viewController = parentResponder as? UIViewController {
                return viewController
            }
            parentResponder = parentResponder?.next
        }
        return nil
    }
}
With this, the following code can be used to inject the delegate into the view controller displaying the Sheet:
uiView.parentViewController?.presentationController?.delegate = delegateView Extension
Using the same method name as the system:
public extension View {
    func interactiveDismissDisabled(_ isDisable: Bool, attemptToDismiss: Binding<UUID>) -> some View {
        background(SetSheetDelegate(isDisable: isDisable, attemptToDismiss: attemptToDismiss))
    }
}
Results
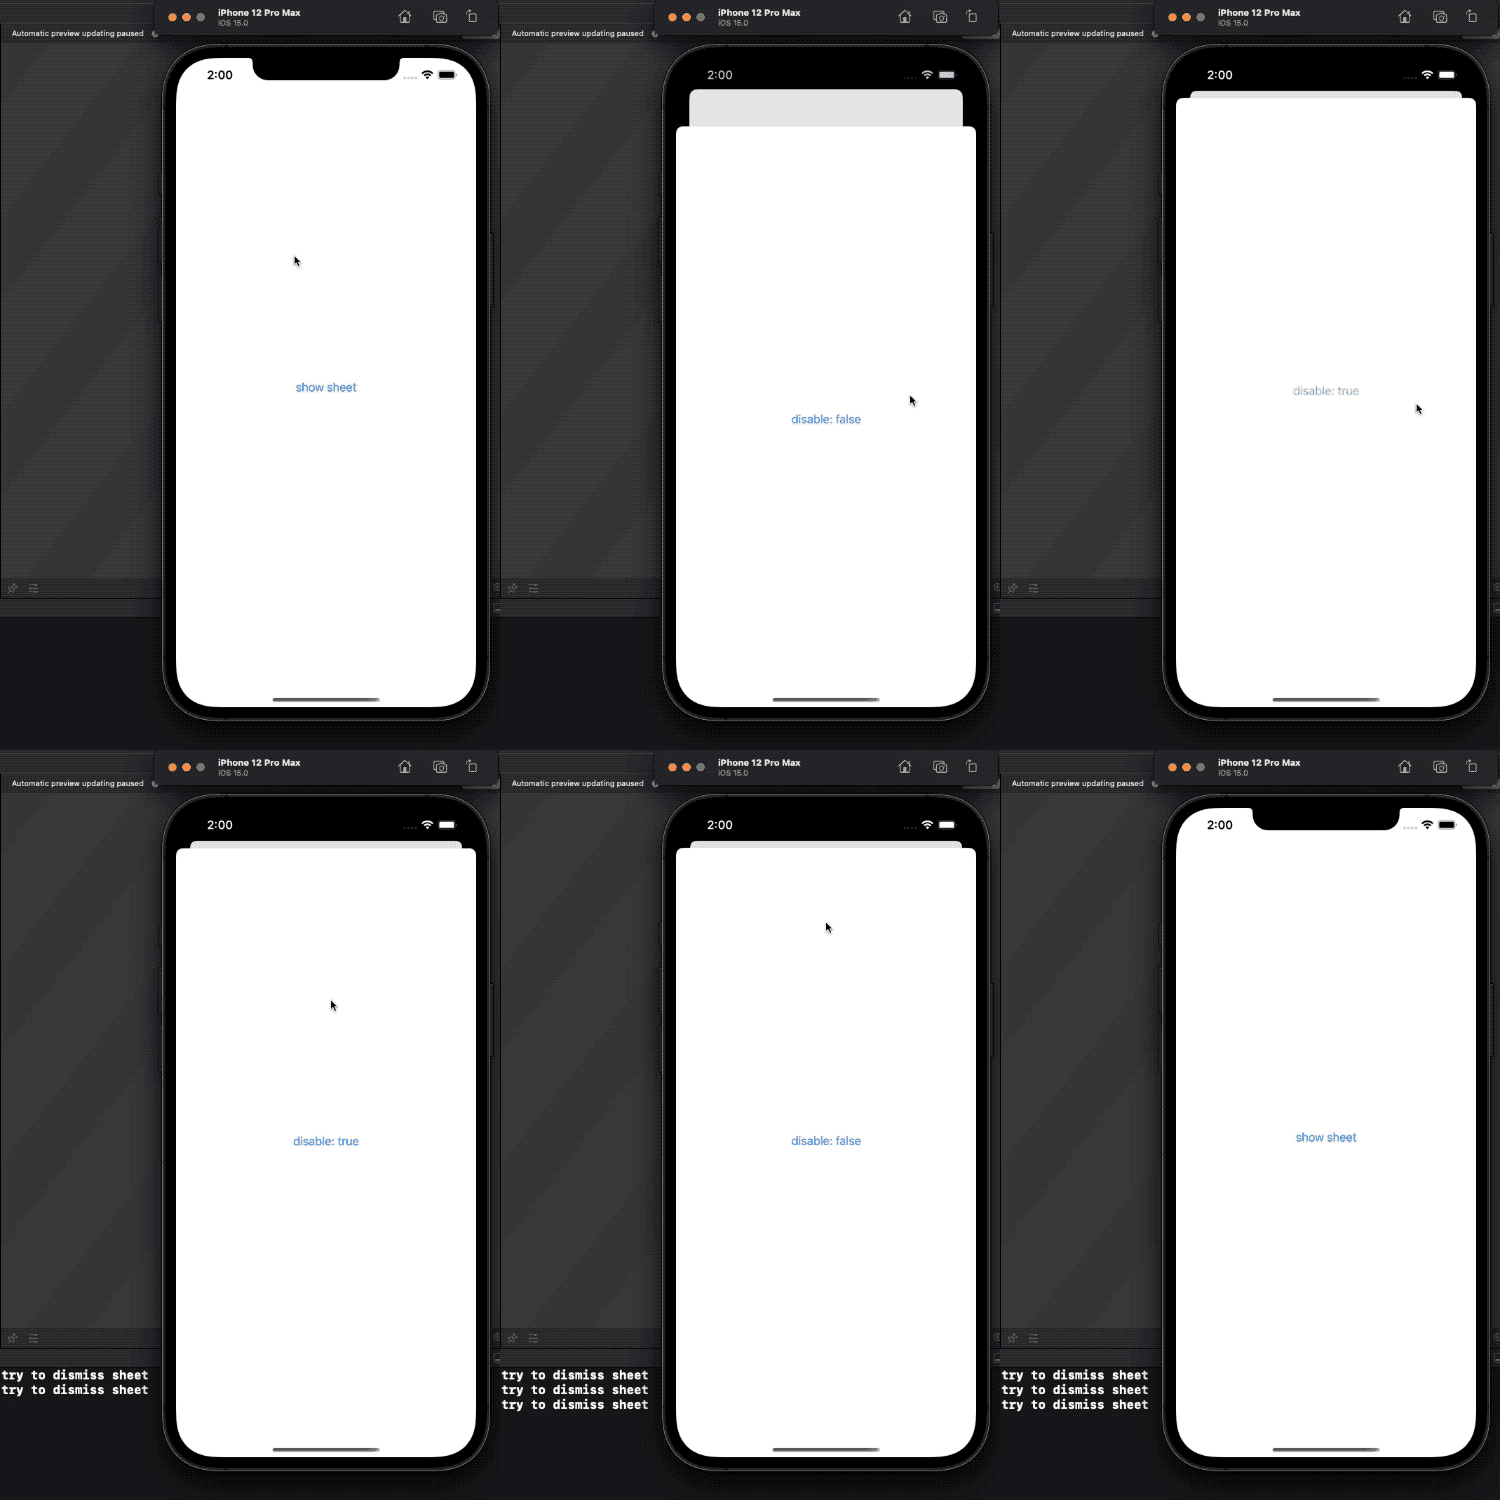
The usage is almost the same as the native functionality:
struct ContentView: View {
    @State var sheet = false
    var body: some View {
        VStack {
            Button("show sheet") {
                sheet.toggle()
            }
        }
        .sheet(isPresented: $sheet) {
            SheetView()
        }
    }
}

struct SheetView: View {
    @State var disable = false
    @State var attemptToDismiss = UUID()
    var body: some View {
        VStack {
            Button("disable: \(disable ? "true" : "false")") {
                disable.toggle()
            }
            .interactiveDismissDisabled(disable, attemptToDismiss: $attemptToDismiss)
        }
        .onChange(of: attemptToDismiss) { _ in
            print("try to dismiss sheet")
        }
    }
}
The code for this article can be found on Gist
Conclusion
SwiftUI has been around for over two years, and developers have gradually mastered various techniques for adding new features to SwiftUI. By learning and understanding native APIs, we can make our implementations more in line with the style of SwiftUI, making the overall code more unified.