2025 Update Note: Although the core logic remains valid, some APIs (such as
onChangeandIntrospect) have changed, and the article has been adjusted for the modern development environment.
SwiftUI’s TextField is likely the text entry component most commonly used by developers in applications. As a SwiftUI wrapper for UITextField (or NSTextField), Apple provides developers with numerous initializers and modifiers to improve its ease of use and customizability. However, in this encapsulation, SwiftUI also shields many advanced interfaces and functions, increasing the complexity for developers to implement certain specific needs. This article is part of the “SwiftUI Advanced” series. In this post, I will introduce how to implement the following functions in a TextField:
- Block invalid characters
- Validate whether the input content meets specific conditions
- Real-time formatted display of input text
The purpose of this article is not to provide a universal solution, but to explore several approaches so readers have a path to follow when facing similar requirements.
Why Not Encapsulate a New Implementation Yourself?
For many developers transitioning from UIKit to SwiftUI, when meeting requirements that official SwiftUI APIs cannot satisfy, it is very natural to think of encapsulating their own implementation using UIViewRepresentable (refer to Using UIKit Views in SwiftUI for more details). In the early days of SwiftUI, this was indeed a very effective method. However, as SwiftUI has matured, Apple has provided a large number of unique features for SwiftUI APIs. Abandoning the official SwiftUI solutions just for certain specific needs is often not worth the cost.
Therefore, in recent years, I have gradually abandoned the idea of implementing certain requirements by self-encapsulation or using third-party extension libraries. When adding new features to SwiftUI, I require myself to adhere to the following principles as much as possible:
- Prioritize considering whether a solution can be found within native SwiftUI methods.
- If a non-native method must be used, try to adopt a non-destructive implementation; new features should not be added at the expense of existing functionality (must be compatible with official SwiftUI modifiers).
These principles are reflected in SheetKit — SwiftUI Modal View Extension Library and Enhancing SwiftUI Navigation Views with NavigationViewKit.
How to Implement Formatted Display in TextField
Existing Formatting Methods
In SwiftUI, TextField provides initializers that use ParseableFormatStyle. Developers can directly use non-String type data (such as integers, floating-point numbers, dates, etc.) and format the input content via the format parameter. For example:
struct FormatterDemo: View {
    @State var number = 100
    var body: some View {
        Form {
            TextField("inputNumber", value: $number, format: .number)
        }
    }
}
However, it is very regrettable that although we can set the final formatting style, TextField cannot format the text display in real-time during the entry process. The text is only formatted when the submit state is triggered (commit) or when focus is lost. This behavior has a certain gap with our initial requirements.
Possible Formatting Solutions
- Activate the
TextField’s built-in Formatter during the entry process, allowing it to format content when the text changes. - Call a self-implemented Format method when the text changes to format the content in real-time.
For the first approach, we can currently use an unconventional method to activate real-time formatting—replacing or canceling the current TextField’s delegate object.
// Requires importing the SwiftUIIntrospect library
import SwiftUIIntrospect

TextField("inputNumber", value: $number, format: .number)
    .introspect(.textField, on: .iOS(.v15, .v16, .v17, .v18, .v19)) { td in
        td.delegate = nil
    }
The code above achieves the replacement of the delegate for the UITextField behind the specified TextField via SwiftUI-Introspect, thereby completing the activation of real-time formatting. Solution 1 in this article is the concrete implementation of this idea.
Note: The code above uses the modern syntax of
SwiftUI-Introspect(v1.0+). The old version’s.introspectTextFieldis no longer recommended.
The second approach is to not use “black magic,” but to rely solely on native SwiftUI ways to format the text when the input text changes. Solution 2 in this article is the concrete implementation of this idea.
How to Block Invalid Characters in TextField
Existing Character Blocking Methods
In SwiftUI, we can implement entry restrictions to a certain extent by setting a specific keyboard type. For example, the following code will only allow the user to enter numbers:
TextField("inputNumber", value: $number, format: .number)
    .keyboardType(.numberPad)
However, the above solution still has considerable limitations.
- Only supports certain types of devices.
- The supported keyboard types are limited.
For example, on the iPad, keyboardType sometimes does not perform as expected. Today, as Apple encourages applications to support multiple device types, it is crucial to allow users to enjoy the same experience on different devices.
In addition, due to the limited supported keyboard types, it is stretched to the limit in many application scenarios. The most typical example is that numberPad does not support the negative sign, which means it is only suitable for positive integers. Some developers can solve this by customizing the keyboard or adding an inputAccessoryView, but for other developers who do not have the ability or energy, it would be a good solution if they could directly block invalid input characters.
Possible Character Blocking Solutions
- Use
UITextFieldDelegate’stextFieldmethod. - In the SwiftUI view, use
onChangeto judge and modify when the entry changes.
The first approach still requires using methods like Introspect to intrude into the UITextField behind the TextField, replacing its original textField method, and performing character judgment within it. In practice, this method is the most efficient means because the judgment occurs before the character is confirmed by UITextField. If we find that the newly added string does not meet our set entry requirements, we can directly return false, and the recently entered character will not appear in the input box.
func textField(_ textField: UITextField, shouldChangeCharactersIn range: NSRange, replacementString string: String) -> Bool {
        // Check if string meets conditions
        if meetsConditions { return true } // Add new character to input box
        else { return false}
 }
However, through the Delegate method, we cannot choose to preserve parts of the characters; that is, we either accept all or accept none (unless we wrap UITextField ourselves, in which case we can implement any logic). Solution 1 adopts this idea.
The second approach supports selective saving, but it also has limitations. Since the TextField’s Formatter initializer uses a special wrapping method, we cannot obtain the content of the input box when the bound value is not a String (such as integers, floating-point numbers, dates, etc.). Therefore, using this approach, we can only use strings as the binding type and will not be able to enjoy the convenience brought by SwiftUI’s native initializers. Solution 2 adopts this idea.
How to Check if Content Meets Specified Conditions in TextField
Compared to the two goals above, checking whether TextField content meets specified conditions in SwiftUI is quite convenient. For example:
TextField("inputNumber", value: $number, format: .number)
    .foregroundColor(number < 100 ? .red : .primary)
The code above sets the text display color to red when the entered number is less than 100.
Of course, we can also continue the idea of the above solution and judge the text in the delegate’s textField method. However, this method is not very adaptable to types (non-String types need conversion).
Other Issues to Consider
Before using the above ideas for actual programming, we also need to consider several other issues:
Localization
The Demo Code provided in this article implements real-time processing for Int and Double types. Although these two types are basically dominated by numbers, localization issues still need to be noted during processing.
For numbers in different regions, their decimal points and group separators may be different, for example:
1,000,000.012 // Most regions
1 000 000,012 // fr
Therefore, when judging valid characters, we need to obtain the region’s decimalSeparator and groupingSeparator through Locale.
If you need to validate dates or other custom format data, it is best to provide processing for localized characters in the code as well.
Formatter
SwiftUI recommends using the ParseableFormatStyle API. It is the Swift native implementation of the old Formatter API, providing a more convenient and safer way of declaration. For more information about the new Formatter, please read Swift Formatter API: New vs Old and How to Customize.
Usability
It is actually not complicated if only implementing the initial goals set in this article, but the implementation method should ideally provide convenient calling means and reduce pollution to the original code.
For example, the following code shows the calling methods for Solution 1 and Solution 2.
// Solution 1
let intDelegate = ValidationDelegate(type: .int, maxLength: 6)
TextField("0...1000", value: $intValue, format: .number)
.addTextFieldDelegate(delegate: intDelegate)
.numberValidator(value: intValue) { $0 < 0 || $0 > 1000 }
// Solution 2
@StateObject var intStore = NumberStore(text: "",
type: .int,
maxLength: 5,
allowNagative: true,
formatter: IntegerFormatStyle<Int>())
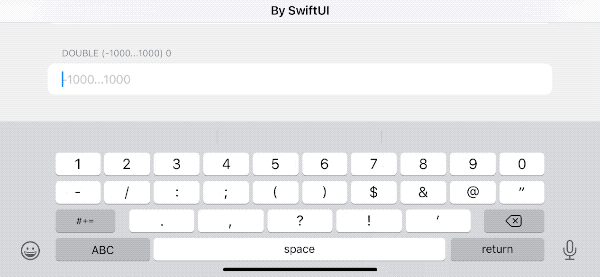
TextField("-1000...1000", text: $intStore.text)
.formatAndValidate(intStore) { $0 < -1000 || $0 > 1000 }The above calling methods still have a lot of room for optimization and integration, such as re-wrapping the TextField (using a View), or using property wrappers to bridge numbers and strings in Solution 2.
Solution 1
You can download the Demo code for this article on Github. Only parts of the code are explained in the article; please refer to the source code for the complete implementation.
Solution 1 uses TextField’s ParseableFormatStyle initializer:
public init<F>(_ titleKey: LocalizedStringKey, value: Binding<F.FormatInput>, format: F, prompt: Text? = nil) where F : ParseableFormatStyle, F.FormatOutput == StringIt activates the built-in Format mechanism of TextField by replacing the delegate, and blocks invalid characters in the delegate’s textField method.
Blocking invalid characters:
func textField(_ textField: UITextField, shouldChangeCharactersIn range: NSRange, replacementString string: String) -> Bool {
        let text = textField.text ?? ""
        return validator(text: text, replacementString: string)
    }

private func validator(text: String, replacementString string: String) -> Bool {
        // Judge valid characters
        guard string.allSatisfy({ characters.contains($0) }) else { return false }
        let totalText = text + string

        // Check decimal point
        if type == .double, text.contains(decimalSeparator), string.contains(decimalSeparator) {
            return false
        }

        // Check negative sign
        let minusCount = totalText.components(separatedBy: minusCharacter).count - 1

        if minusCount > 1 {
            return false
        }
        if minusCount == 1, !totalText.hasPrefix("-") {
            return false
        }

        // Check length
        guard totalText.count < maxLength + minusCount else {
            return false
        }
        return true
}
It should be noted that different Locales will provide different valid character sets (characters).
Adding View Extension:
import SwiftUIIntrospect

extension View {
    // Adjust text color based on whether specific conditions are met
    func numberValidator<T: Numeric>(value: T, errorCondition: (T) -> Bool) -> some View {
        foregroundColor(errorCondition(value) ? .red : .primary)
    }
    // Replace delegate
    func addTextFieldDelegate(delegate: UITextFieldDelegate) -> some View {
        introspect(.textField, on: .iOS(.v15, .v16, .v17, .v18, .26)) { td in
            td.delegate = delegate
        }
    }
}
Solution 2
Solution 2 adopts the native method of SwiftUI to achieve the same goal. Since it cannot utilize TextField’s built-in Formatter or original text features, the implementation is more complex than Solution 1. Additionally, in order to validate input characters in real-time, only the String type can be used as the binding type for TextField. The calling is also slightly more complicated than Solution 1 (it can be further simplified by wrapping it again).
To save some temporary data, we need to create a class conforming to ObservableObject to manage the data uniformly.
class NumberStore<T: Numeric, F: ParseableFormatStyle>: ObservableObject where F.FormatOutput == String, F.FormatInput == T {
    @Published var text: String
    let type: ValidationType
    let maxLength: Int
    let allowNagative: Bool
    private var backupText: String
    var error: Bool = false
    private let locale: Locale
    let formatter: F

    init(text: String = "",
         type: ValidationType,
         maxLength: Int = 18,
         allowNagative: Bool = false,
         formatter: F,
         locale: Locale = .current)
    {
        self.text = text
        self.type = type
        self.allowNagative = allowNagative
        self.formatter = formatter
        self.locale = locale
        backupText = text
        self.maxLength = maxLength == .max ? .max - 1 : maxLength
    }
The formatter is passed to NumberStore and called in getValue.
// Return validated number
    func getValue() -> T? {
        // Special handling (empty content, only negative sign, floating point starts with decimal separator)
        if text.isEmpty || text == minusCharacter || (type == .double && text == decimalSeparator) {
            backup()
            return nil
        }

        // Use string with group separators removed to judge if characters are valid
        let pureText = text.replacingOccurrences(of: groupingSeparator, with: "")
        guard pureText.allSatisfy({ characters.contains($0) }) else {
            restore()
            return nil
        }

        // Handle multiple decimal points
        if type == .double {
            if text.components(separatedBy: decimalSeparator).count > 2 {
                restore()
                return nil
            }
        }

        // Multiple negative signs
        if minusCount > 1 {
            restore()
            return nil
        }

        // Negative sign must be the first character
        if minusCount == 1, !text.hasPrefix("-") {
            restore()
            return nil
        }

        // Judge length
        guard text.count < maxLength + minusCount else {
            restore()
            return nil
        }

        // Convert text to number, then convert back to text (ensure text format is correct)
        if let value = try? formatter.parseStrategy.parse(text) {
            let hasDecimalCharacter = text.contains(decimalSeparator)
            text = formatter.format(value)
            // Protect the last decimal point (otherwise, the text converted back might not include the decimal point)
            if hasDecimalCharacter, !text.contains(decimalSeparator) {
                text.append(decimalSeparator)
            }
            backup()
            return value
        } else {
            restore()
            return nil
        }
    }
In Solution 2, besides blocking invalid characters, we also need to handle the implementation of formatting ourselves. The new Formatter API has very good fault tolerance for strings. Therefore, converting text to a numeric value via parseStrategy first, and then converting it back to a standard string will ensure that the text in TextField always maintains correct display.
Additionally, we need to consider cases where the first character is - or the last character is a decimal point, because parseStrategy will lose this information after conversion. We need to reproduce these characters in the final conversion result.
extension View {
    @ViewBuilder
    func formatAndValidate<T: Numeric, F: ParseableFormatStyle>(_ numberStore: NumberStore<T, F>, errorCondition: @escaping (T) -> Bool) -> some View {
        onChange(of: numberStore.text) { _, text in
            if let value = numberStore.getValue(), !errorCondition(value) {
                numberStore.error = false // Transfer validation status via NumberStore
            } else if text.isEmpty || text == numberStore.minusCharacter {
                numberStore.error = false
            } else { numberStore.error = true }
        }
        .foregroundColor(numberStore.error ? .red : .primary)
        .disableAutocorrection(true)
        .textInputAutocapitalization(.never)
        .onSubmit { // Handle case with only one decimal point
            if numberStore.text.count > 1 && numberStore.text.suffix(1) == numberStore.decimalSeparator {
                numberStore.text.removeLast()
            }
        }
    }
}
Unlike Solution 1 where logic is scattered across multiple parts of the code, in Solution 2, all logic is triggered and called within onChange.
Since onChange is called only after the text changes, Solution 2 causes the view to refresh twice. However, considering the application scenario of text entry, the performance loss can be ignored (if property wrappers are used to further link numbers with strings, it might further increase the number of view refreshes).
Comparison of the Two Solutions
-
Efficiency
Since Solution 1 theoretically only requires the view to refresh once per entry, its execution efficiency is theoretically higher than Solution 2. However, in actual use, both can provide smooth and timely interaction effects.
-
Supported Data Types
Solution 1 can directly use multiple data types. Solution 2 requires converting the original value into a string of the corresponding format in the
TextFieldinitializer. In the demo code for Solution 2, the numeric value corresponding to the string can be obtained viaresult. -
Optional Value Support
The
TextFieldinitializer used in Solution 1 (supporting formatter) does not support optional value types; an initial value must be provided. This is unfavorable for judging whether the user has entered new information (for more information, refer to How to Create a Real-time Responsive Form in SwiftUI).Solution 2 allows not providing an initial value and supports optional values.
Additionally, in Solution 1, if all characters are cleared, the bound variable will still have a value (original API behavior), which can easily cause confusion for users during entry.
-
Sustainability (SwiftUI Backward Compatibility)
Since Solution 2 is written entirely in the SwiftUI way, its sustainability is theoretically stronger than Solution 1. However, unless SwiftUI makes major changes to the underlying implementation logic, Solution 1 will still run normally in modern versions.
-
Compatibility with Other Modifiers
Both Solution 1 and Solution 2 meet the previously proposed requirement of full compatibility with official APIs, gaining functional enhancements without loss.
Summary
Every developer hopes to provide an efficient and elegant interaction environment for users. This article only covers part of TextField. in other chapters of “SwiftUI TextField Advanced”, we will explore more techniques and ideas to let developers create unique text entry experiences in SwiftUI.