Due to the limited capabilities of SwiftUI’s native navigation options, using NavigationView has often been less than ideal in previous versions. Here are several aspects that I found unsatisfactory:
- Lack of a convenient way to return directly to the root view
- Inability to navigate to a new view through code (without using
NavigationLink) - Inconsistent display style in double column mode (
DoubleColumnNavigationViewStyle) - On iPad, the inability to maintain a double column layout in portrait mode
Therefore, in the preparation phase of this development, I wrote an extension library for NavigationView - NavigationViewKit. This extension adheres to the following principles:
-
Non-destructive
Any newly added functionality should not affect the current native features provided by SwiftUI, especially the behavior of elements like
ToolbarandNavigationLinkin NavigationView -
As user-friendly as possible
The new features can be used with minimal code
-
Native SwiftUI style
The methods for using the extension features should be as similar as possible to the native SwiftUI approach
Please visit Github to download NavigationViewKit
NavigationViewManager
Introduction
One of the biggest complaints developers have about NavigationView is the lack of a convenient way to return to the root view. Currently, there are two common solutions:
-
Re-wrapping
UINavigationControllerA good wrapper can indeed utilize the many features offered by
UINavigationController, but it’s very likely to conflict with native SwiftUI methods, making it a choice between one or the other -
Using programmatic
NavigationLinkThis involves dismissing the programmatic
NavigationLink(usually throughisActive) of the root view to return. This method limits the variety ofNavigationLinks that can be used and is not conducive to implementation from non-view code.
NavigationViewManager is a navigation view manager provided in NavigationViewKit, offering the following features:
- Manages all NavigationViews in the application
- Supports returning directly to the root view from any view under NavigationView through code
- Enables direct navigation to a new view from any view under NavigationView through code (without describing
NavigationLinkin the view) - Utilizes
NotificationCenterto specify any NavigationView in the application to return to the root view - Uses
NotificationCenterto direct any NavigationView in the application to navigate to a new view - Supports enabling or disabling transition animations
Registering NavigationView
Since NavigationViewManager supports managing multiple navigation views, each managed navigation view needs to be registered.
import NavigationViewKit
NavigationView {
            List(0..<10) { _ in
                NavigationLink("abc", destination: DetailView())
            }
        }
        .navigationViewManager(for: "nv1", afterBackDo: {print("back to root") })
navigationViewManager is a View extension, defined as follows:
extension View {
    public func navigationViewManager(for tag: String, afterBackDo cleanAction: @escaping () -> Void = {}) -> some View
}
for is the name (or tag) of the currently registered NavigationView, and afterBackDo is the code block to be executed after transitioning to the root view.
Each managed NavigationView in the application should have a unique tag.
Returning to the Root View from a View
In any child view of a registered NavigationView, you can return to the root view with the following code:
@Environment(\.navigationManager) var nvmanager

Button("back to root view") {
    nvmanager.wrappedValue.popToRoot(tag:"nv1"){
           print("other back")
           }
}
popToRoot is defined as follows:
func popToRoot(tag: String, animated: Bool = true, action: @escaping () -> Void = {})tag is the registered Tag of the current NavigationView, animated sets whether to show transition animation when returning to the root view, and action is an additional clean-up code block. This block of code will be executed after the registration code block (afterBackDo), mainly for passing data from the current view.
You can get the registration Tag of the current NavigationView for easy view reuse in different NavigationViews using:
@Environment(\.currentNaviationViewName) var tagstruct DetailView: View {
@Environment(\.navigationManager) var nvmanager
@Environment(\.currentNaviationViewName) var tag
var body: some View {
VStack {
Button("back to root view") {
if let tag = tag {
nvmanager.wrappedValue.popToRoot(tag:tag,animated: false)
{
print("other back")
}
}
}
}
}
}Using NotificationCenter to Return to the Root View
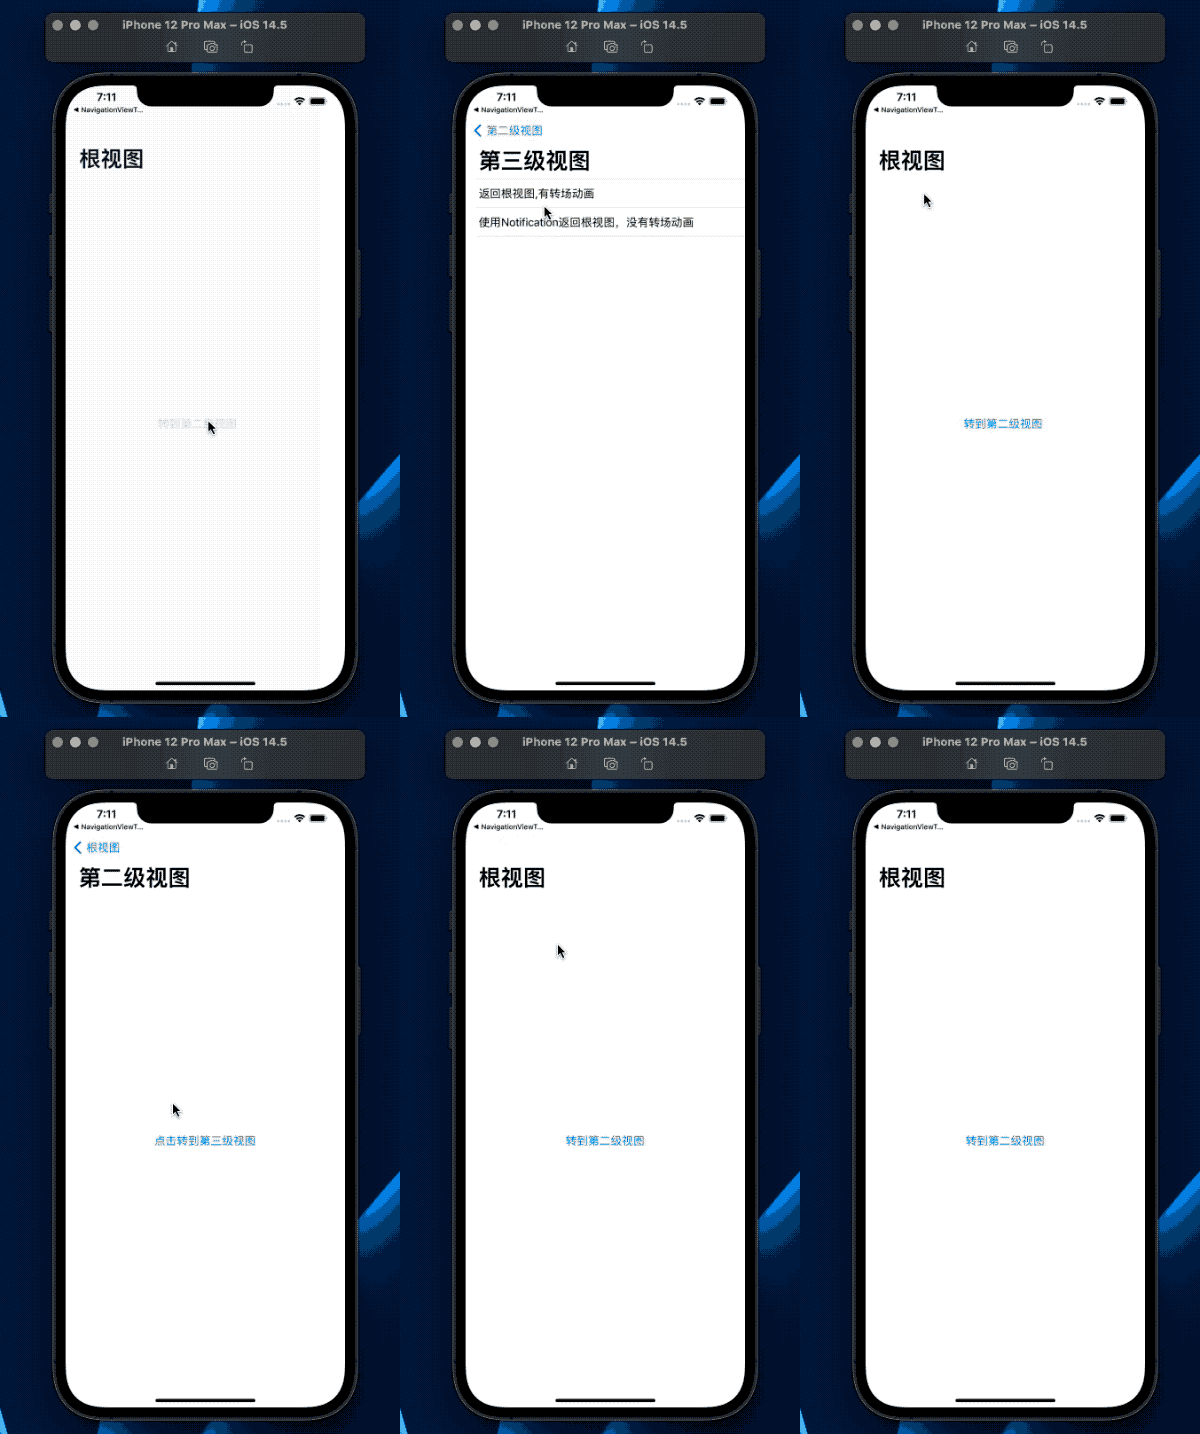
Since the primary use of NavigationViewManager in my app is to handle Deep Links, most of the time it’s not called from view code. Therefore, NavigationViewManager provides a similar method based on NotificationCenter.
To use it in code:
let backToRootItem = NavigationViewManager.BackToRootItem(tag: "nv1", animated: false, action: {})
NotificationCenter.default.post(name: .NavigationViewManagerBackToRoot, object: backToRootItem)
This allows the specified NavigationView to return to the root view.
Demonstration as follows:
Navigating to a New View from a View
To use in view code:
@Environment(\.navigationManager) var nvmanager

Button("go to new View"){
        nvmanager.wrappedValue.pushView(tag:"nv1",animated: true){
            Text("New View")
                .navigationTitle("new view")
        }
}
pushView is defined as:
func pushView<V: View>(tag: String, animated: Bool = true, @ViewBuilder view: () -> V)tag is the registration Tag for the NavigationView, animation sets whether to show transition animation, and view is for the new view. The view supports all native SwiftUI definitions, such as toolbar, navigationTitle, etc.
Currently, when enabling transition animations, the title and toolbar will only appear after the transition, which is a slight drawback in terms of user experience. I plan to address this in the future.
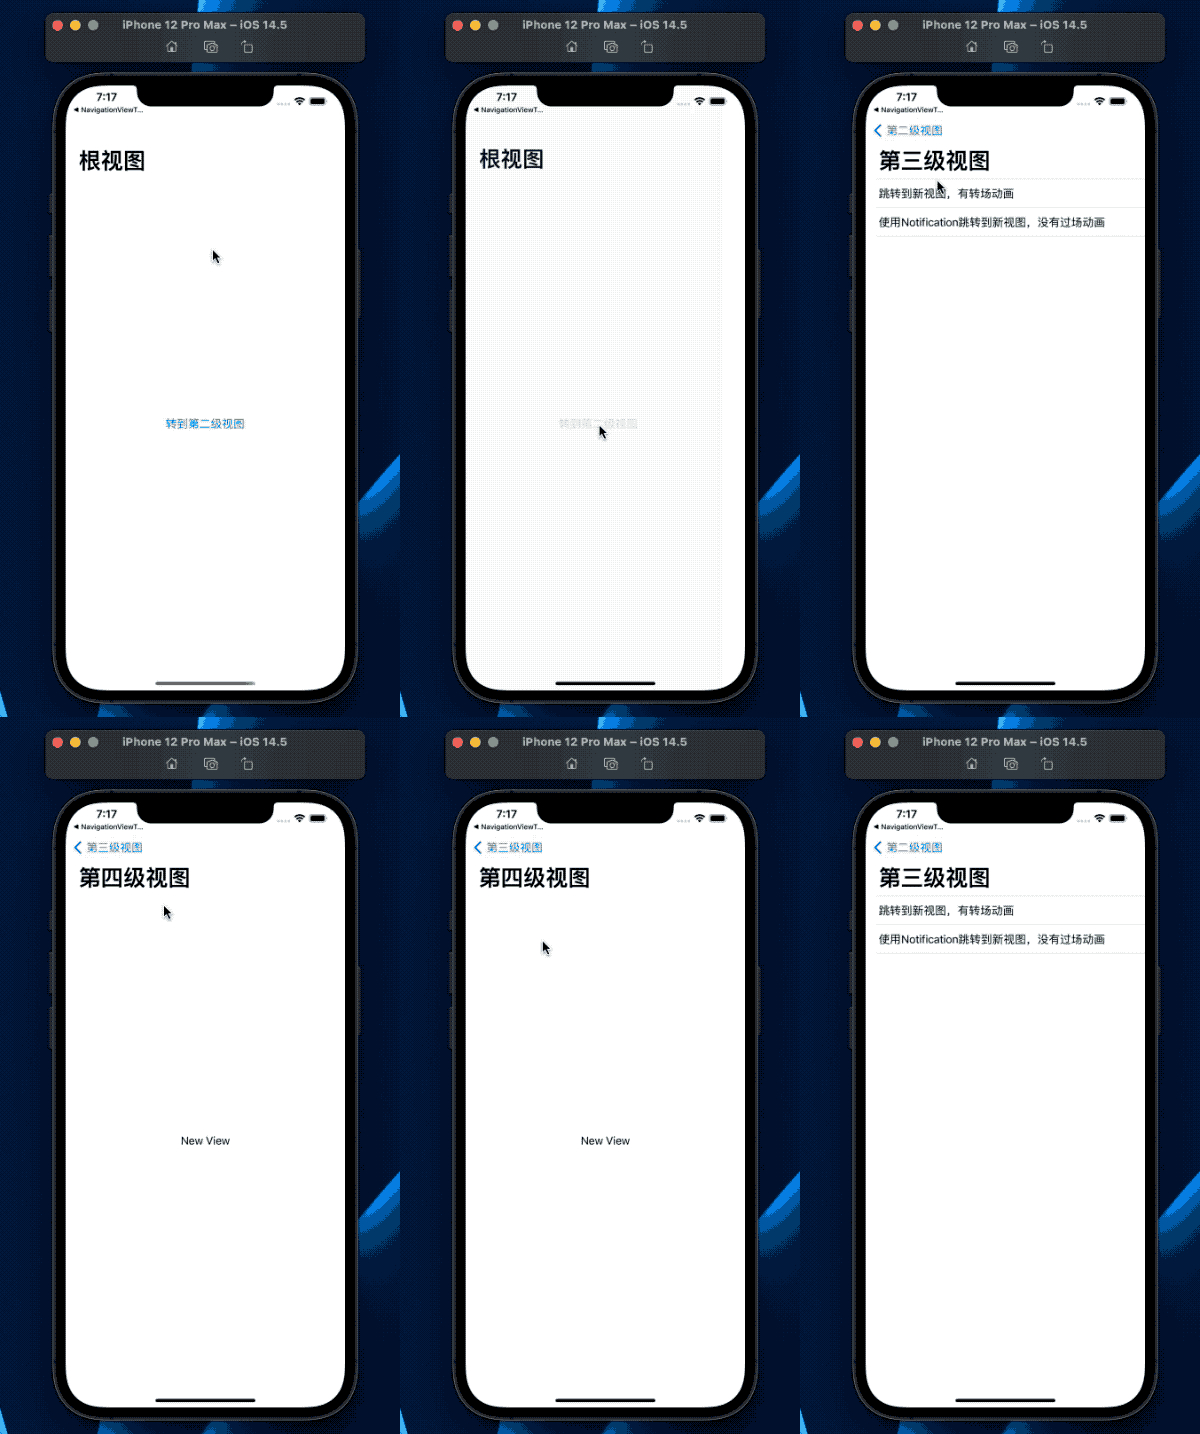
Using NotificationCenter to Navigate to a New View
In code:
let pushViewItem = NavigationViewManager.PushViewItem(tag: "nv1", animated: false) {
                    AnyView(
                        Text("New View")
                            .navigationTitle("第四级视图")
                    )
                }
NotificationCenter.default.post(name:.NavigationViewManagerPushView, object: pushViewItem)
When navigating views through NotificationCenter, the view needs to be converted to AnyView.
Demonstration:
DoubleColumnJustForPadNavigationViewStyle
DoubleColumnJustForPadNavigationViewStyle is a modified version of DoubleColumnNavigationViewStyle. Its purpose is to improve the display on iPhone Max in landscape mode when the same code is used for both iPhone and iPad, which differs from other iPhone models.
When the iPhone Max is in landscape mode, the NavigationView displays in a double-column layout similar to the iPad, making the app’s behavior inconsistent across different iPhone models.
When using DoubleColumnJustForPadNavigationViewStyle, the iPhone Max in landscape mode still presents a StackNavigationViewStyle appearance.
Usage:
NavigationView{
   ...
}
.navigationViewStyle(DoubleColumnJustForPadNavigationViewStyle())
In swift 5.5, you can directly use:
.navigationViewStyle(.columnsForPad)TipOnceDoubleColumnNavigationViewStyle
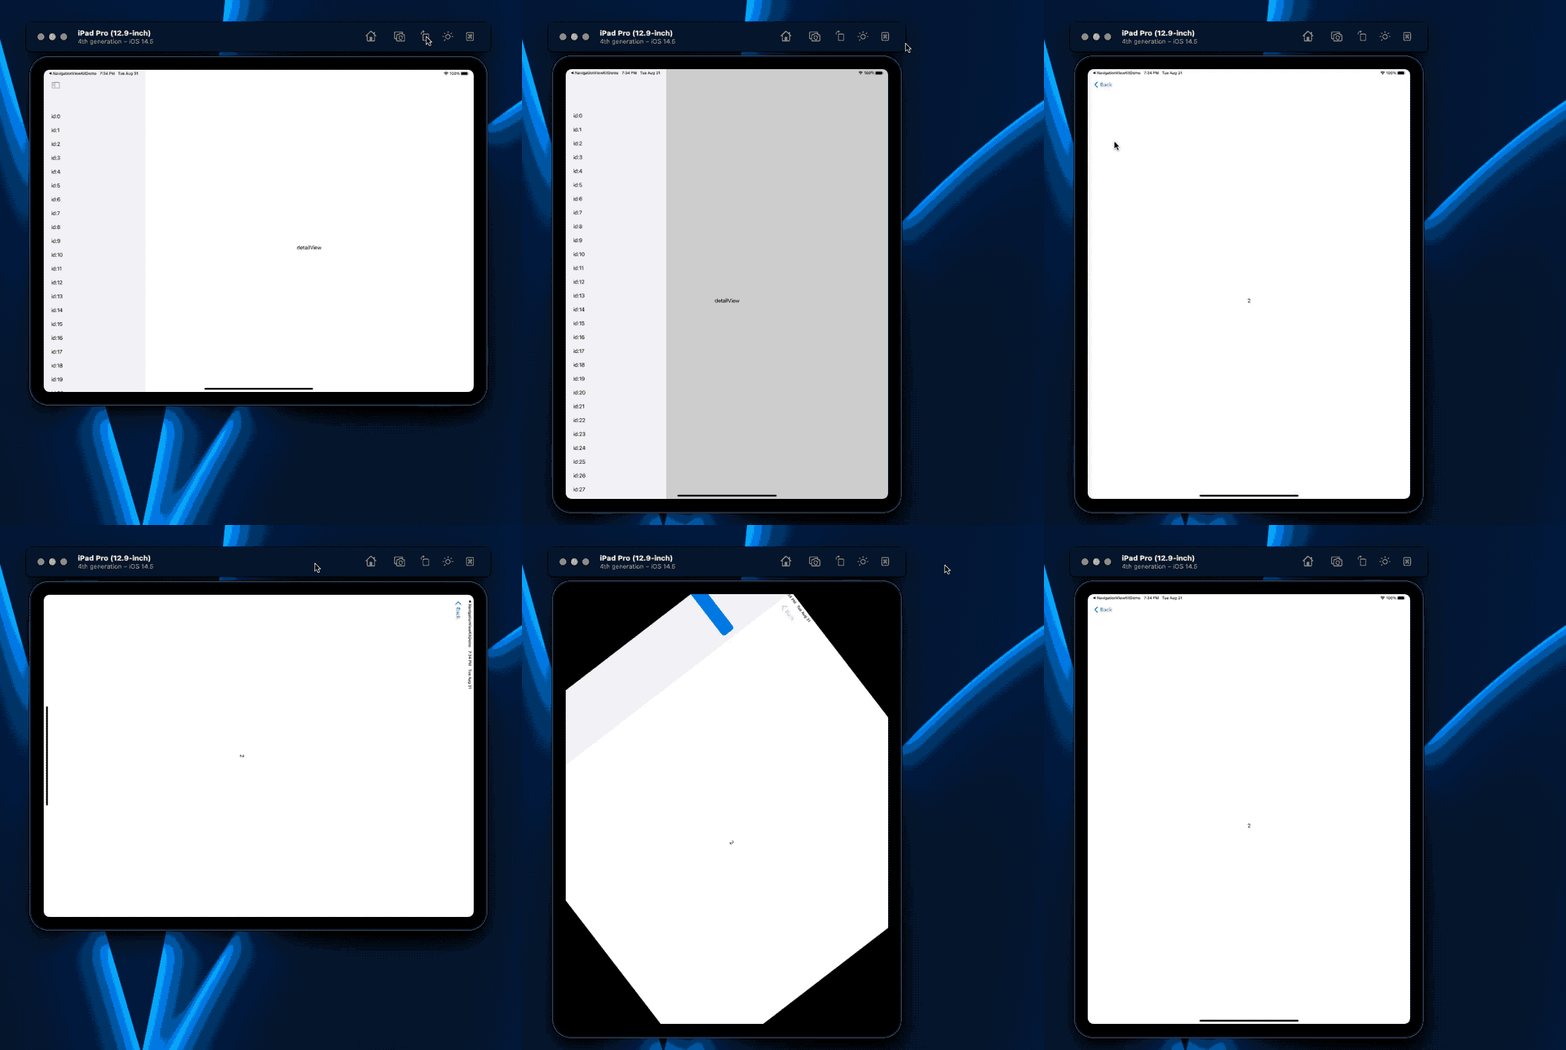
Currently, DoubleColumnNavigationViewStyle exhibits different behaviors on the iPad in landscape and portrait modes. In portrait mode, the left column is typically hidden by default, which can be confusing for new users.
TipOnceDoubleColumnNavigationViewStyle provides a one-time reminder to users on the iPad when entering portrait mode for the first time, by showing the left column above the right one. This reminder occurs only once. If the orientation is rotated and then re-entered into portrait mode, the reminder will not be triggered again.
NavigationView{
   ...
}
.navigationViewStyle(TipOnceDoubleColumnNavigationViewStyle())
In Swift 5.5, you can directly use:
.navigationViewStyle(.tipColumns)Demonstration:
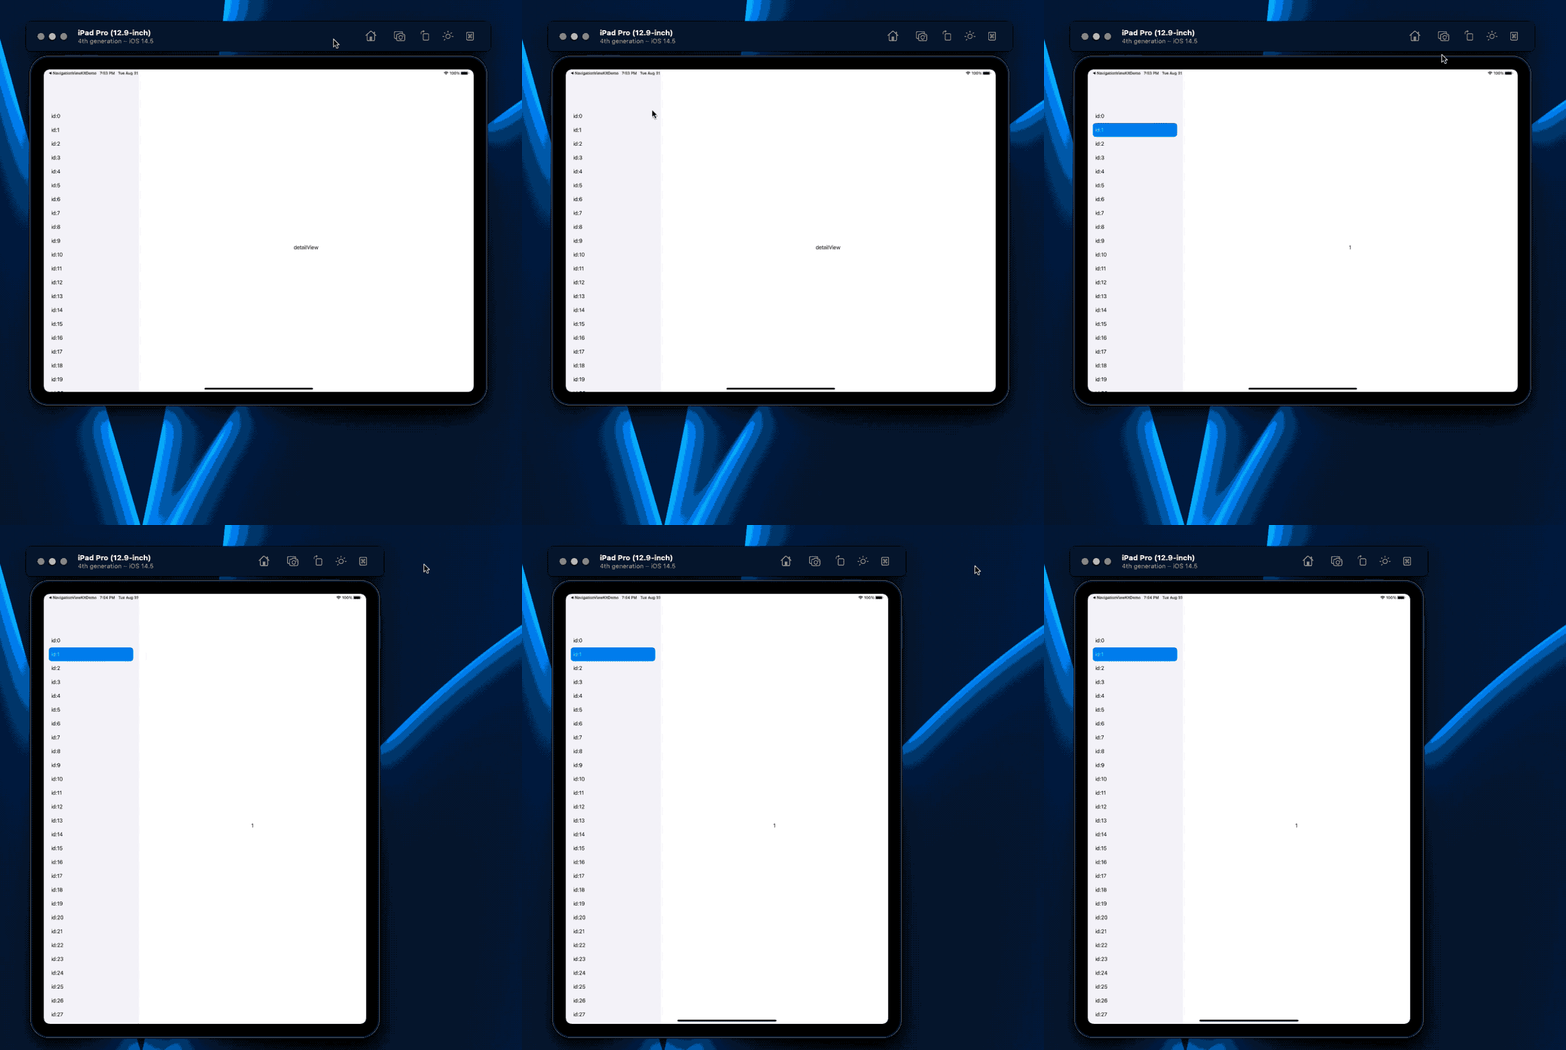
FixDoubleColumnNavigationViewStyle
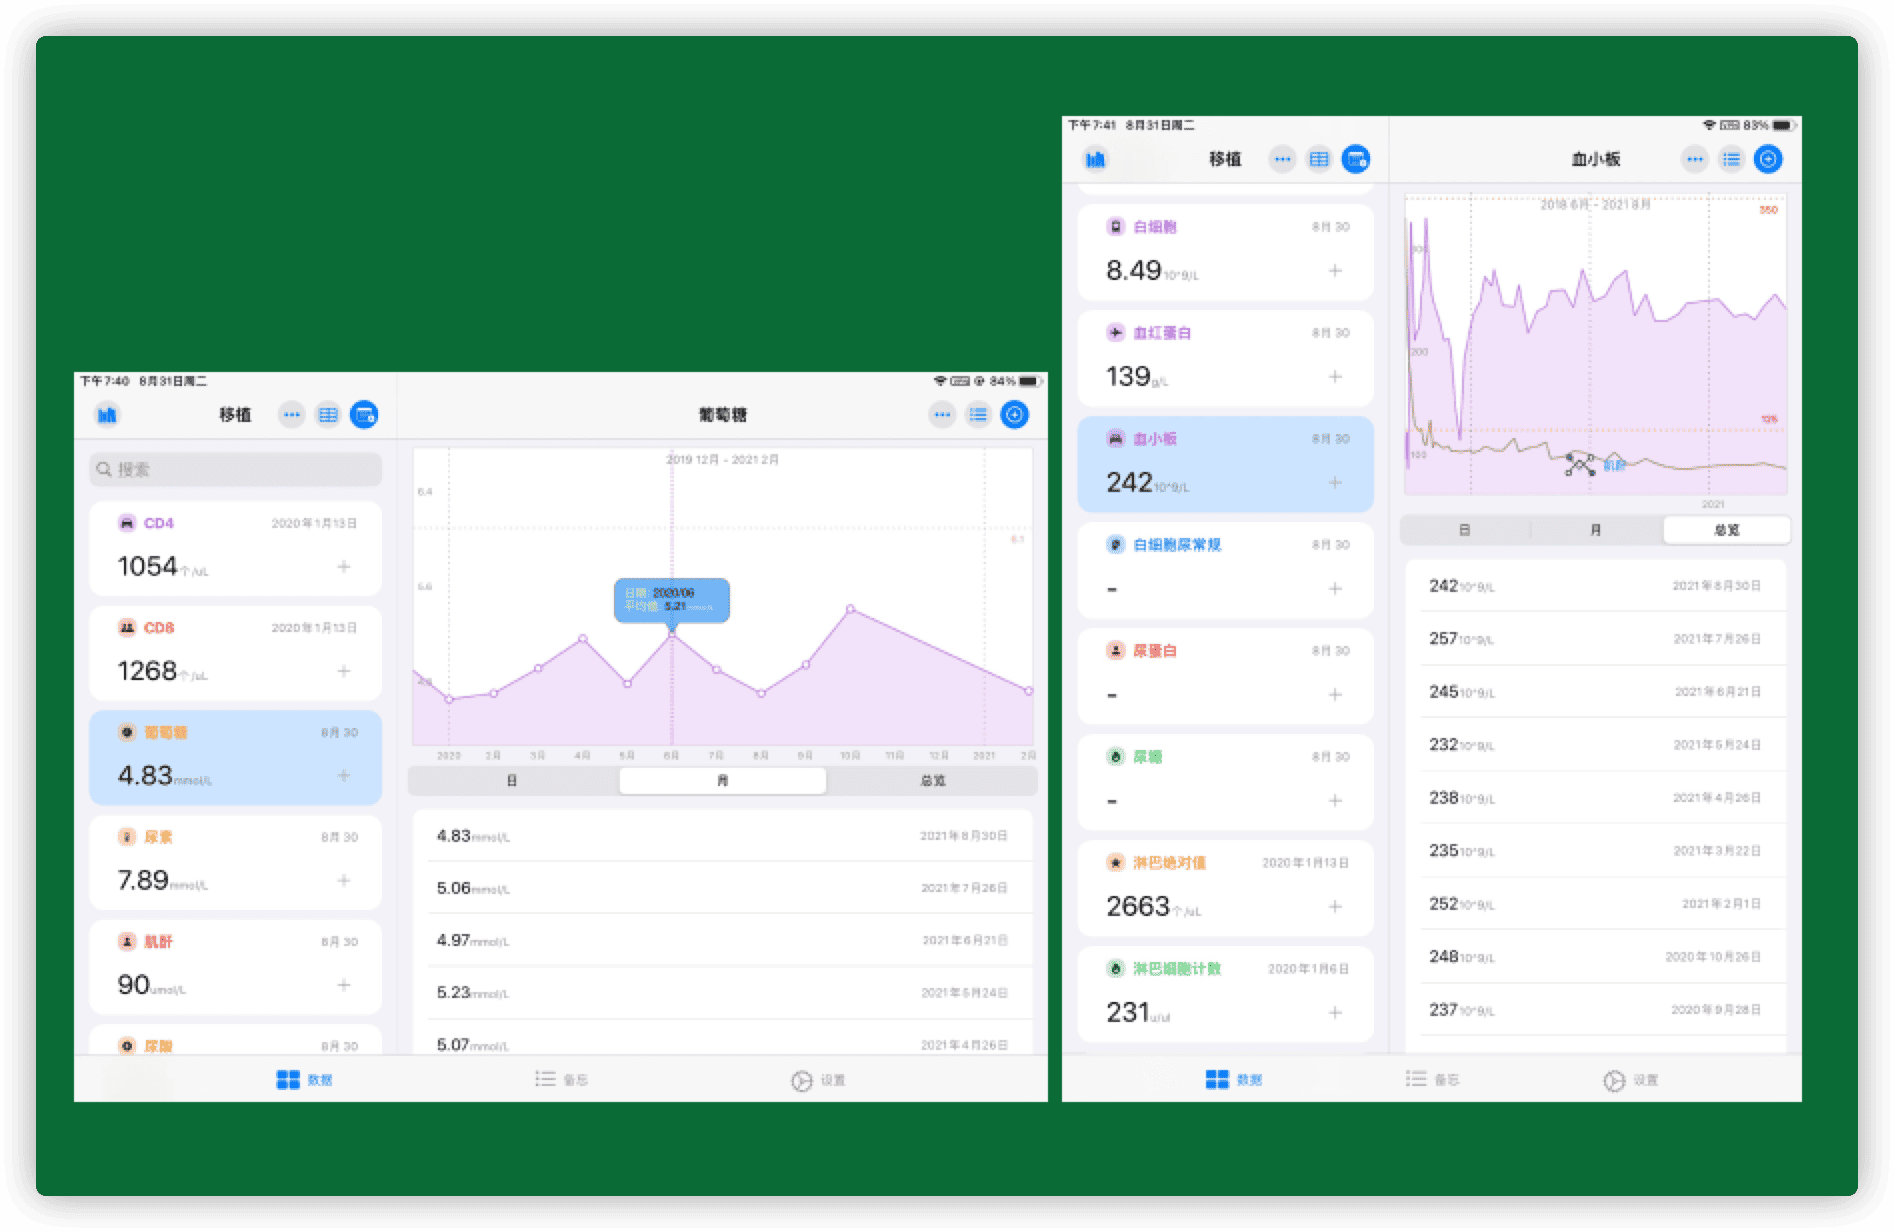
In Health Notes, I wanted the iPad version to always maintain a two-column display in both landscape and portrait modes, with the left column being non-collapsible.
Previously, I achieved this effect by wrapping two NavigationViews in an HStack:
Now, this can be easily implemented with FixDoubleColumnNavigationViewStyle from NavigationViewKit.
NavigationView{
   ...
}
.navigationViewStyle(FixDoubleColumnNavigationViewStyle(widthForLandscape: 350, widthForPortrait:250))
Moreover, you can set different widths for the left column in landscape and portrait modes.
Demonstration:
Conclusion
NavigationViewKit currently has a limited set of features. I plan to gradually add new functionalities based on my own usage needs.
If you encounter any issues or have specific requirements while using it, please submit an issue on Github or leave a message on my blog.
Please visit Github to download NavigationViewKit