A few days ago, a netizen in the chat room discussed the following question with everyone: How to use Text + AttributedString to achieve the function of searching for keywords in an article, and switch scrolling in the search results through buttons?
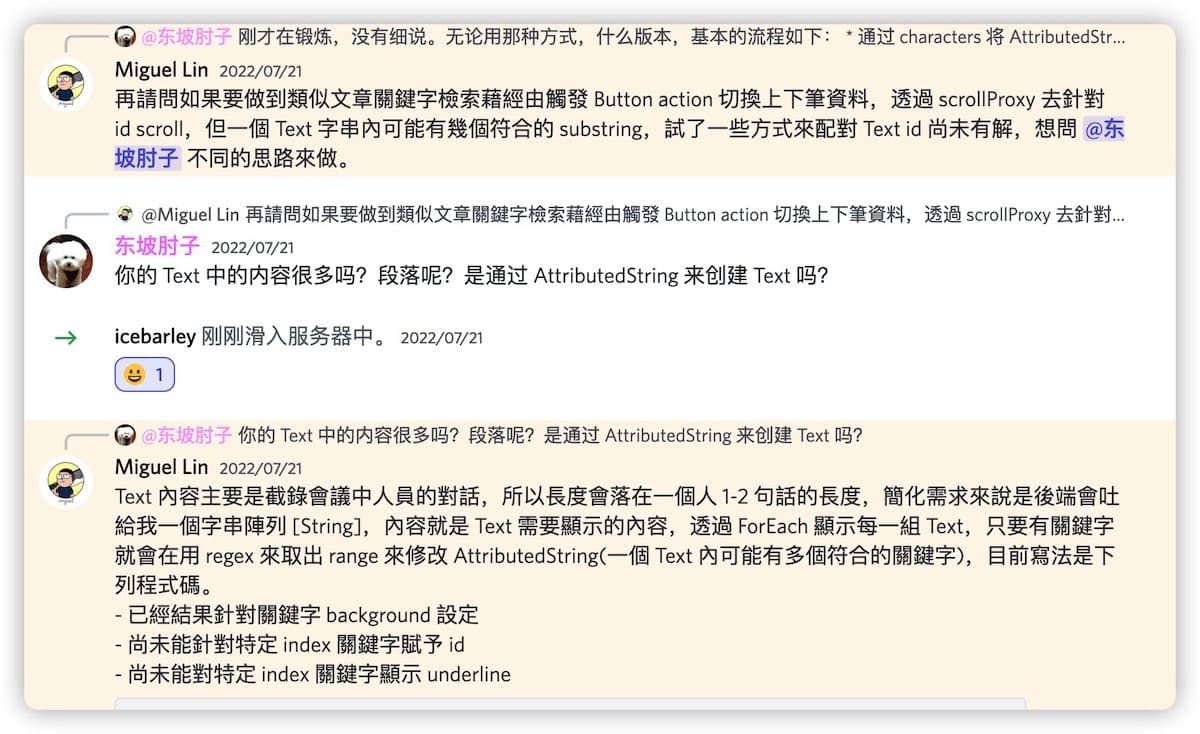
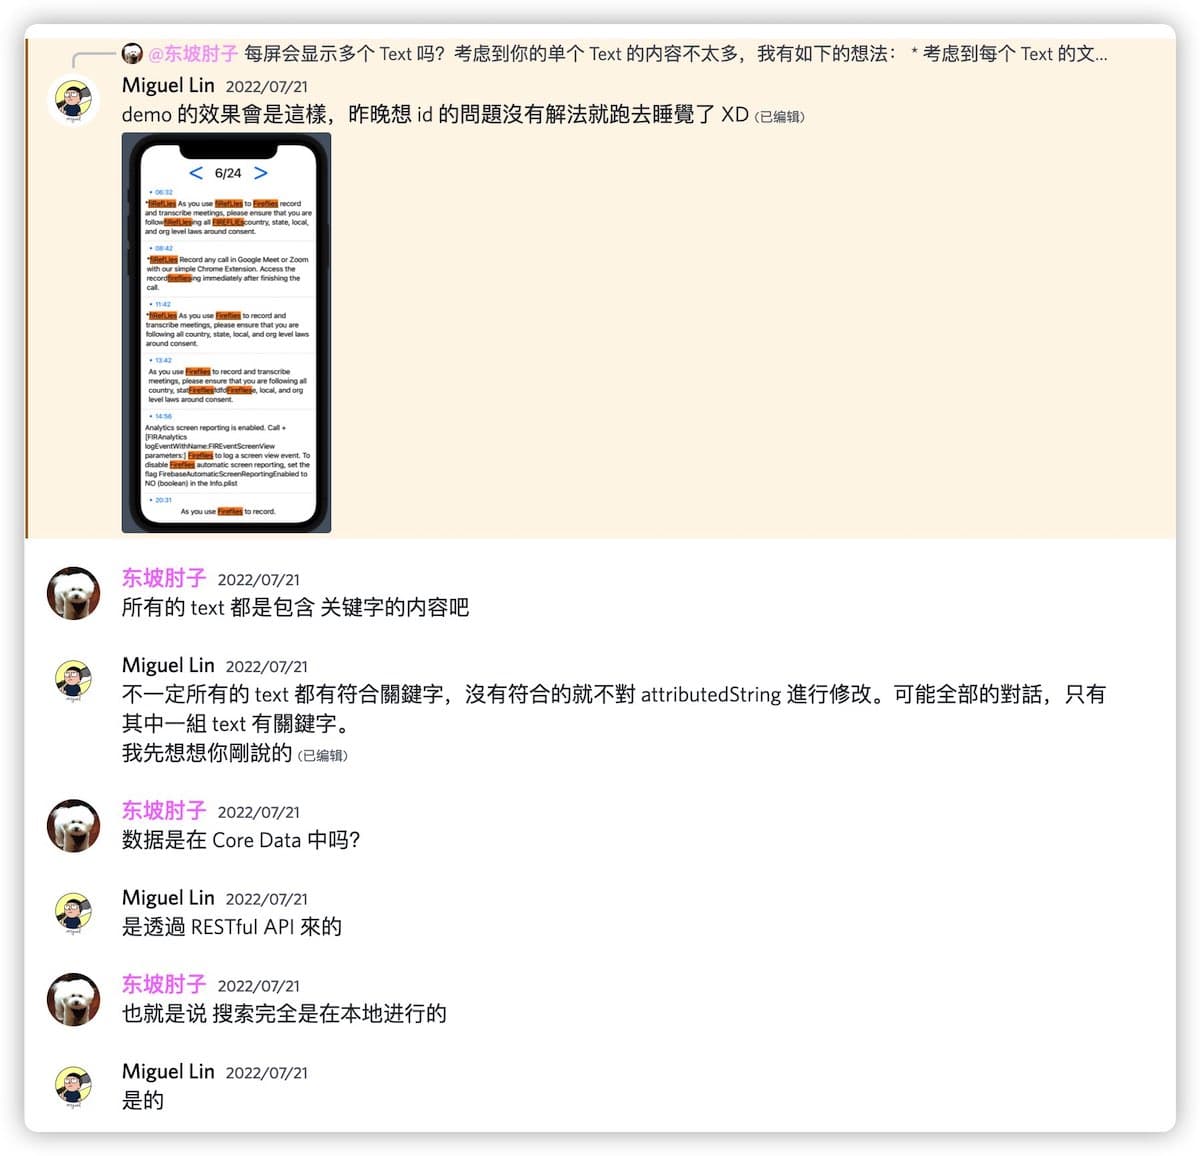
Considering that this issue is relatively novel for the application of SwiftUI, and involves a lot of knowledge that has been discussed in many blogs, I have reorganized the solution provided by the chat room and discussed the solution ideas, methods, and precautions with everyone through this article.
You can get the sample code for this article from here, using Xcode 14 beta 5 as the development environment.
Key Points of the Problem
- Conduct keyword queries in scattered data and record search results.
The data format provided by the questioner is as follows:
struct Transcription: Equatable, Identifiable {
    let id = UUID()
    let startTime: String
    var context: String
}

let transcriptions: [Transcription] = [
    .init(startTime: "06:32", context: "张老三,我问你,你的家乡在哪里"),
    .init(startTime: "08:42", context: "我的家,在山西,过河还有三百里"),
]- Highlight search results (real-time response)
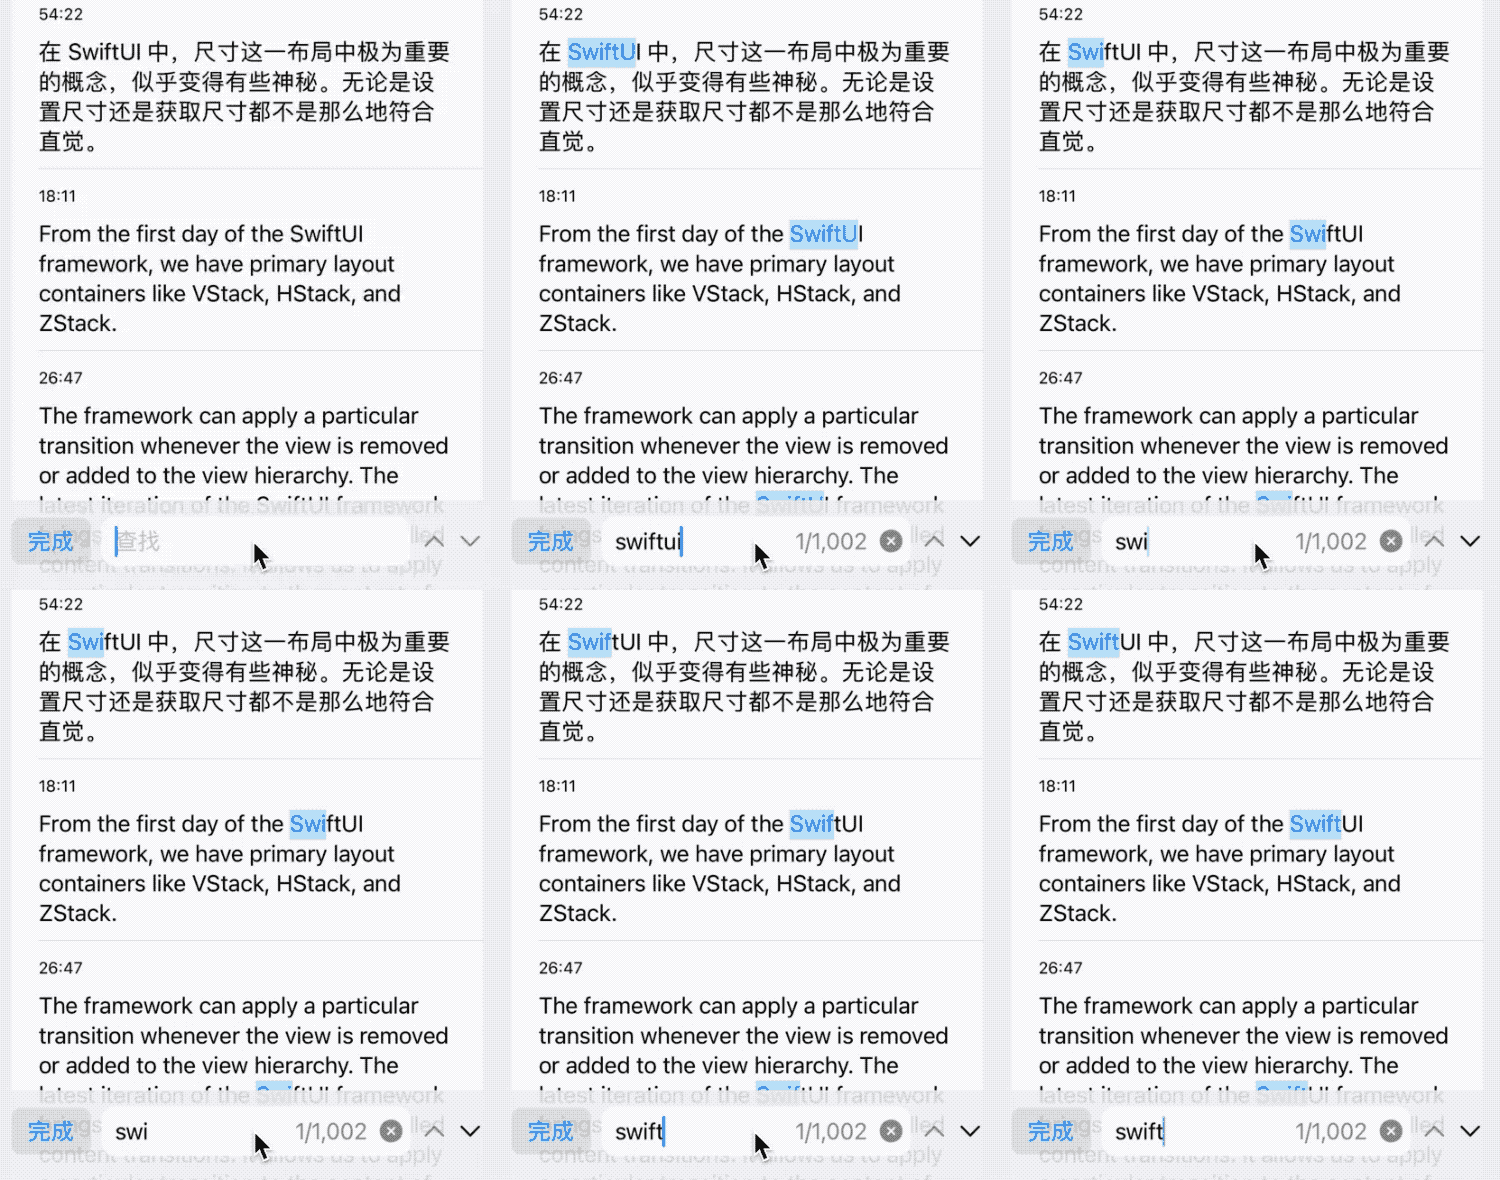
- Switch search results through buttons

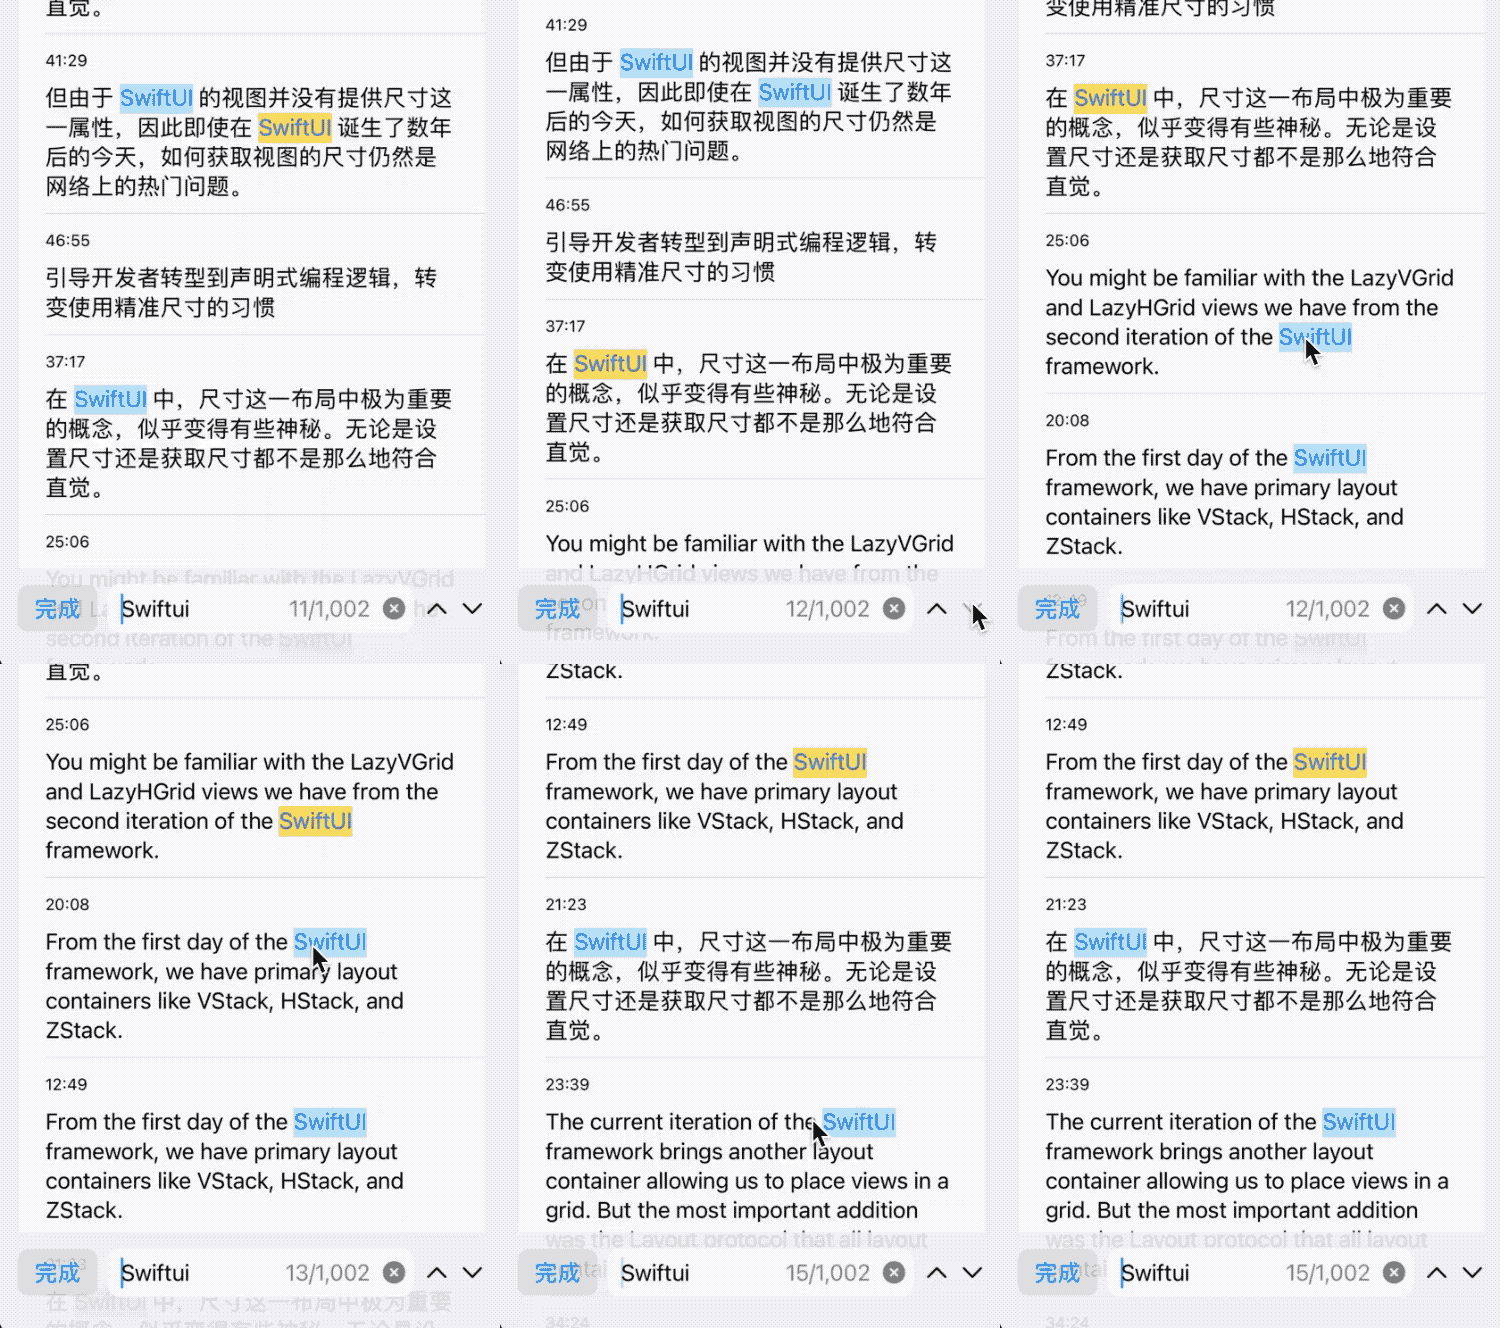
- Automatically locate the position of the search result when switching between results
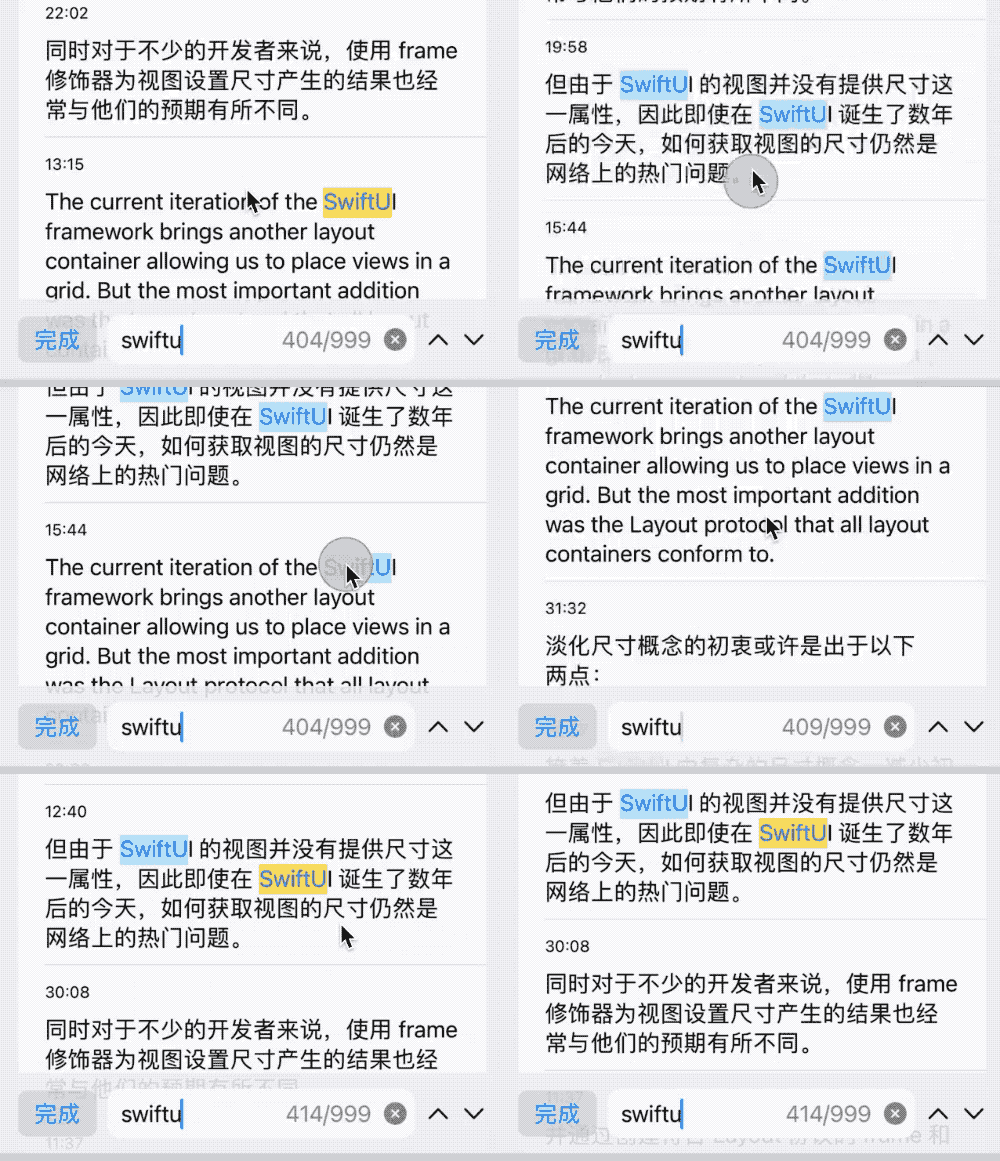
- Clicking on a keyword that is not currently highlighted will automatically set it as the current highlight keyword and scroll to the center of the view
- There should be no performance bottleneck when dealing with a large amount of dialogue data (thousands of records).
Solution
There are a thousand Hamlets in a thousand people’s eyes. The content of this section only represents my thoughts and ideas when considering how to solve the aforementioned problems. Many of the features have gone beyond the original requirements. Adding these features is not only conducive to integrating more knowledge points from previous blogs, but also enhances the fun of problem-solving.
Keyword search
Get all information that satisfies the search criteria through regular expressions.
- Create regular expressions through Regex
In recent years, Apple has gradually added more and more native Swift implementations to Foundation. After adding AttributedString and FormatStyle last year, Regex, a Swift version of regular expressions, has been added this year.
For the current problem, we first need to create a regular expression for searching in the transcription (recording to text) based on the keywords:
let regex = Regex<AnyRegexOutput>(verbatim: keyword).ignoresCase()

// Equivalent to
let regex = try! NSRegularExpression(pattern: keyword, options: [.caseInsensitive,.ignoreMetacharacters])
verbatim ensures that special characters in keywords are not treated as regular expression parameters. ignoresCase means that a case-insensitive regular expression will be created.
- Use ranges(of regex:) to get matching ranges.
Using the new regex methods added to Swift Strings, you can quickly obtain the information you need from a query:
for transcription in transcriptions {
    let ranges = transcription.context.ranges(of: regex) ranges
    for range in ranges {
       ...
    }
}
Considering that we only need to match intervals, we used the ranges method. Using matches can provide richer information.
- Save more data for positioning and intelligent highlighting
In order to facilitate the display and positioning of future search results, the following information needs to be recorded for each search - the total number of search results, the current highlighted result position, the transcription that contains the search results, the range in each transcription that meets the conditions, and the index (position) in the search results. In order to facilitate other condition judgments, we have created two auxiliary dictionaries with the transcription ID and position that meet the conditions as keys respectively.
@Published var count: Int // result count
@Published var rangeResult: [UUID: [TranscriptionRange]] // search result transcription.id : result interval and index
@Published var currentPosition: Int? // current highlight position
@Published var positionProxy: [Int: UUID] // result index : transcription.id
var positionProxyForID: [UUID: [Int]] = [:] // transcription.id : [result index]

struct TranscriptionRange {
    let position: Int
    let range: Range<String.Index>
}
Highlighting
In the display view TranscriptionRow of Transcription, the results are highlighted using AttributedString.
Please read AttributedString: Making Text More Beautiful Than Ever to learn more about AttributedString.
- Convert
Range<String.Index>toAttributedString.Index
The result type obtained through the ranges method of a string is Range<String.Index>. Therefore, we need to convert it to AttributedString.Index before we can use it in AttributedString:
var text = AttributedString(transcription.context)
let lowerBound = AttributedString.Index(transcriptionRange.range.lowerBound, within: text)
let upperBound = AttributedString.Index(transcriptionRange.range.upperBound, within: text)- Set the interval to highlight display through the index method of AttributedString
if ranges.currentPosition == transcriptionRange.position {
    text[lowerBound..<upperBound].swiftUI.backgroundColor = currentHighlightColor
    if bold {
        text[lowerBound..<upperBound].foundation.inlinePresentationIntent = .stronglyEmphasized
    }
} else {
    text[lowerBound..<upperBound].swiftUI.backgroundColor = highlightColor
}
Change the background color of all content that meets the search criteria. Use a brighter color and bold font to highlight the current selection.
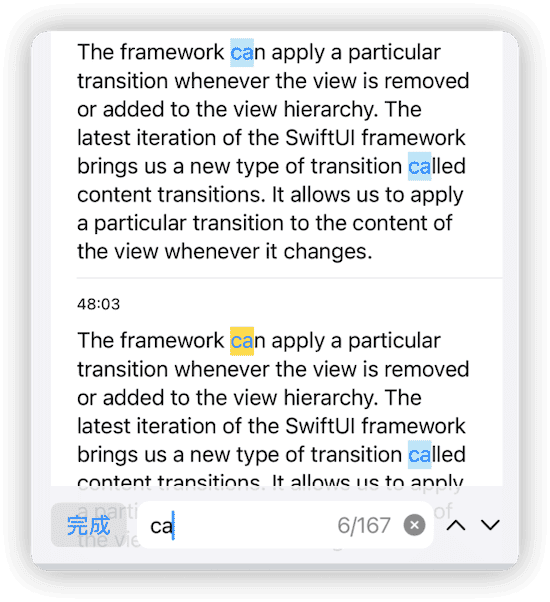
Click the toggle button to locate the corresponding search result
Add explicit identifiers to the TranscriptionRow view and scroll to the specified location through ScrollViewProxy.
- Use the id modifier to add location information to the transcription
List(0..<store.transcriptions.count,id:\.self) { index in
    let transcription = store.transcriptions[index]
    TranscriptionRow()
    .id(transcription.id)
}
When adding explicit identifiers (using the id modifier) to views within a ForEach (implicit ForEach is used in the above code), List will create instances (not render) for all views in ForEach to compare the constructor arguments of the view types when the view is refreshed. However, only the displayed part of Row views on the screen will be rendered.
Therefore, in this example, we abandoned passing the search results through constructor arguments as TranscriptionRow, and instead introduced a Source of Truth that conforms to the DynamicProperty protocol in TranscriptionRow. This way, only the currently displayed TranscriptionRow will be recalculated and rendered when the search results change (if id is not added, passing the search through constructor arguments will be more helpful for performance improvement).
- Get the transcriptionID that needs to be scrolled to using currentPosition
Since the scrolling position is based on the transcription ID, we need to convert the position index of the search results into the corresponding transcription ID:
var currentID: UUID? { // The transcription ID where the current highlight is located, used for scrollTo
    guard let currentPosition else { return nil }
    return positionProxy[currentPosition]
}- Compare the values of the transcription ID before and after the change using onChange to reduce unnecessary scrolling.
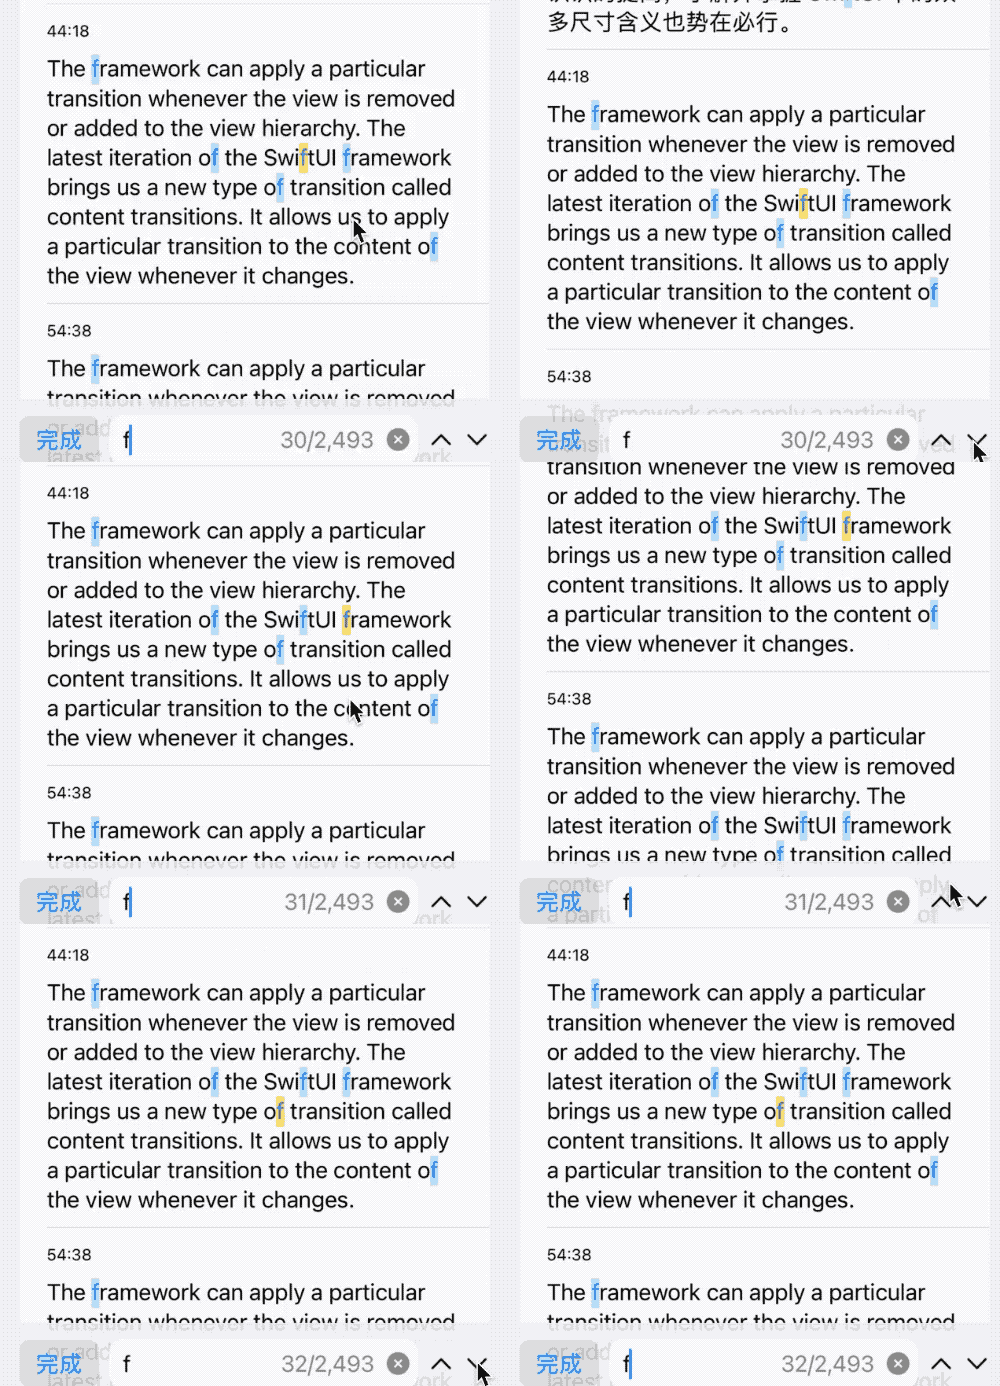
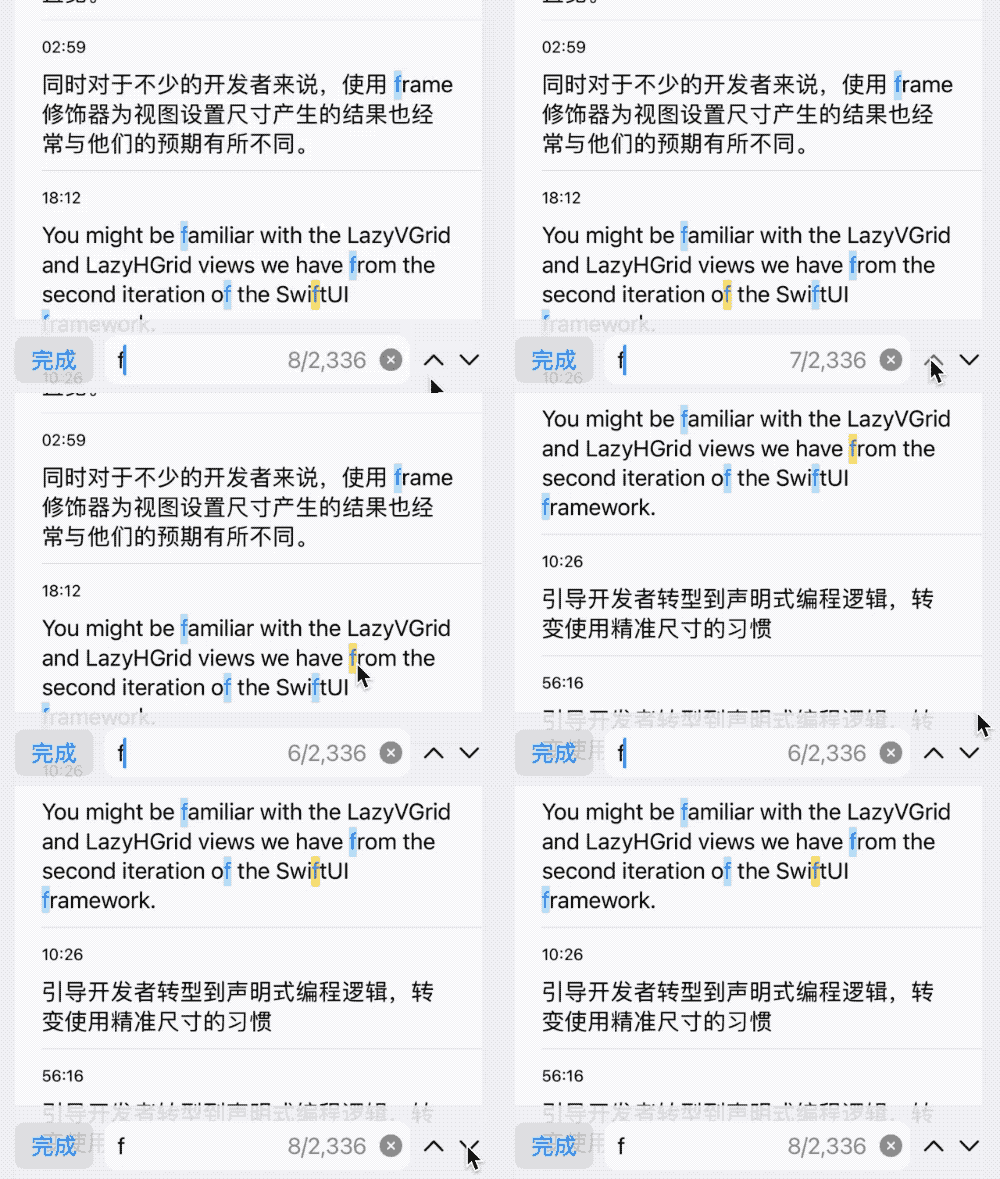
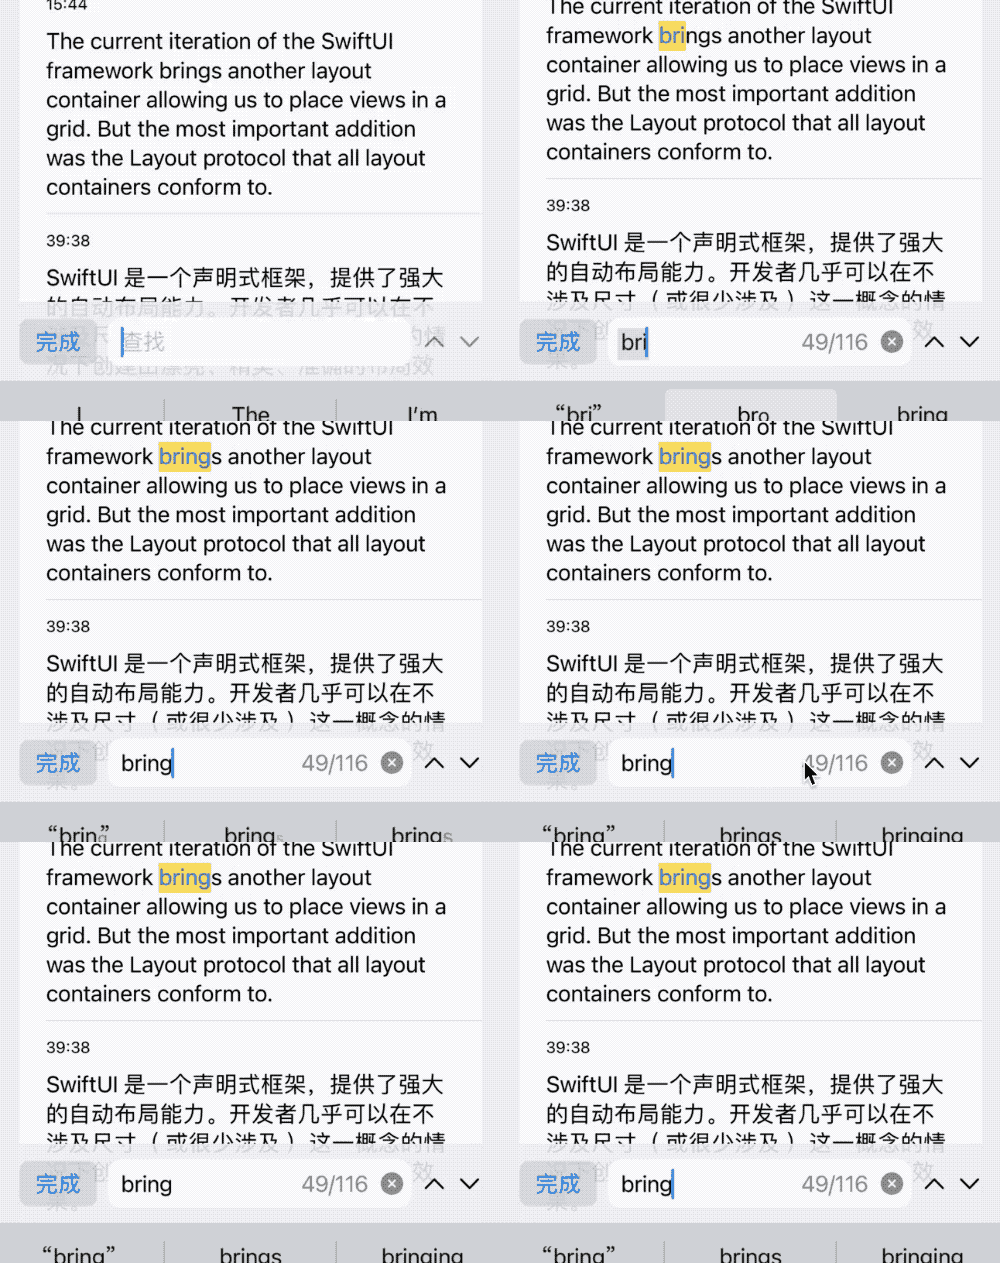
Considering the user’s reading experience, if the result value in the current located transcription is already the highlighted value (the currently selected highlight position), and the next index position is still within the same transcription, scrolling will be skipped. This can be achieved by comparing the new value with the saved old value in the closure of onChange.
.onChange(of: store.currentPosition) { [lastID = store.currentID] _ in
    let currentID = store.currentID
    if lastID != currentID {
        withAnimation {
            scrollProxy.scrollTo(currentID, anchor: .center)
        }
    }
}

func gotoPrevious() {
    if let currentPosition, currentPosition > 0 {
        self.currentPosition = currentPosition - 1
    }
}

func gotoNext() {
    if let currentPosition, currentPosition < count - 1 {
        self.currentPosition = currentPosition + 1
    }
}
Scenario without comparing old and new values:
Compared the old and new values to avoid unnecessary scrolling:
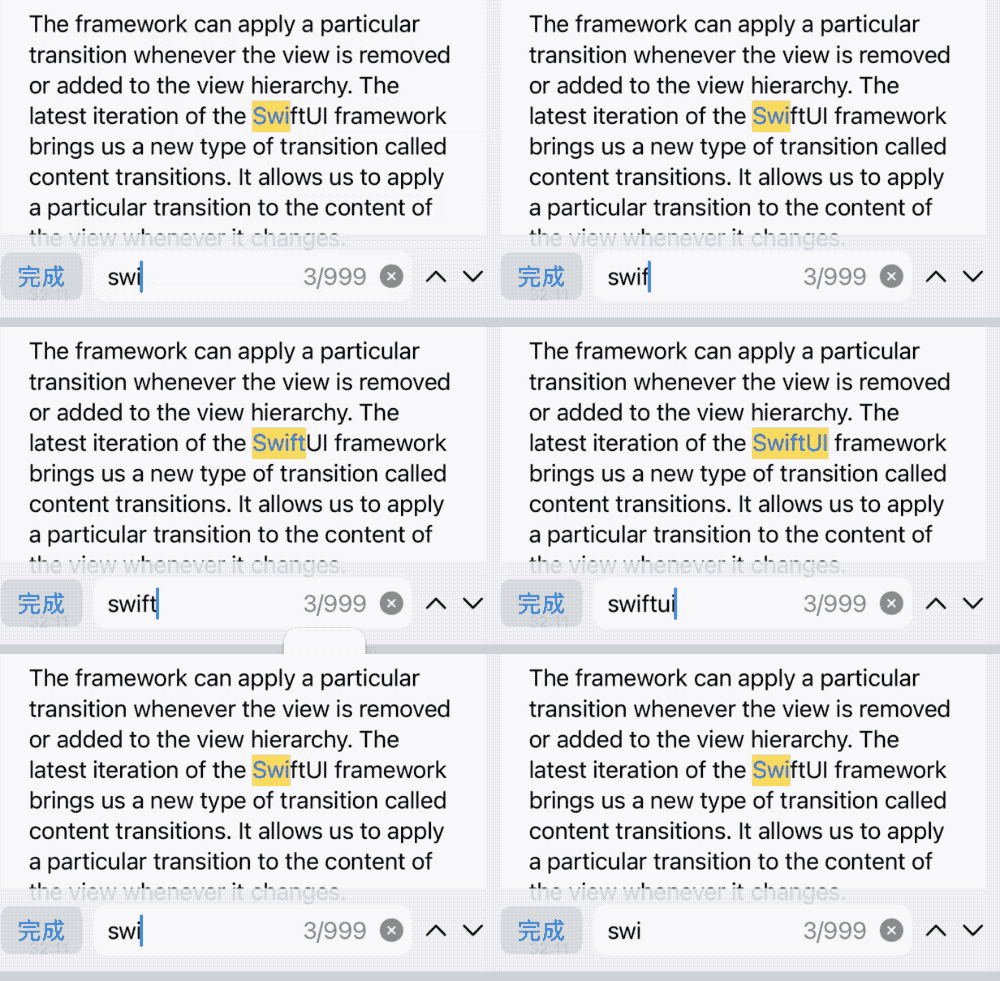
Conditionally reposition after changing search keywords
- If the current highlighted position still meets the condition without scrolling
/// Prioritize the currently selected keywords
private func getCurrentPositionIfSubRangeStillExist(oldRange: [UUID: [TranscriptionRange]], newRange: [UUID: [TranscriptionRange]], keyword: String, oldCurrentPosition: Int?) -> Int? {
    if let oldResult = oldRange.lazy.first(where: { $0.value.contains(where: { $0.position == oldCurrentPosition }) }),
       let oldRange = oldResult.value.first(where: { $0.position == oldCurrentPosition })?.range,
       let newResult = newRange.lazy.first(where: { $0.key == oldResult.key && $0.value.contains(where: { oldRange.overlaps($0.range) || $0.range.overlaps(oldRange) }) }),
       let newPosition = newResult.value.first(where: { oldRange.overlaps($0.range) })?.position
    {
        return newPosition
    } else {
        let nearPosition = getCurrentPositionIfInOnScreen()
        return nearPosition ?? nil
    }
}
- Prioritize locating the transcription currently displayed on the screen in search results
Locate search results first in the transcription currently displayed on the List. If the displayed transcription does not meet the criteria, the first result that meets the criteria will be located.
To achieve this goal, we first need to record which transcriptions are being displayed in the List and their indices. This can be achieved through onAppear and onDisappear:
var onScreenID: [UUID: Int] = [:] // transcription IDs currently displayed on the screen

List(0..<store.transcriptions.count, id: \\.self) { index in
    let transcription = store.transcriptions[index]
    TranscriptionRow()
    .onAppear { store.onScreenID[transcription.id] = index }
    .onDisappear { store.onScreenID.removeValue(forKey: transcription.id) }
    .id(transcription.id)
}
In List, onAppear is called when each view enters the display window, and onDisappear is called when each view exits the display window.
Prioritize locating search results closest to the center of the screen:
// Select the nearest matching position from the currently displayed transcription in the List
private func getCurrentPositionIfInOnScreen() -> Int? {
    guard let midPosition = Array(onScreenID.values).mid() else { return nil }
    let idList = onScreenID.sorted(by: { (Double($0.value) - midPosition) < (Double($1.value) - midPosition) })
    guard let id = idList.first(where: { positionProxyForID[$0.key] != nil })?.key, let position = positionProxyForID[id] else { return nil }
    guard let index = transcriptions.firstIndex(where: { $0.id == id }) else { return nil }
    if Double(index) >= midPosition {
        return position.first
    } else {
        return position.last
    }
}
Click on a search result to switch the current selection
Click on a search result that is not currently selected to set it as the current selection
- Add location information through the link property of AttributedString
let positionScheme = "goPosition" // Custom scheme

text[lowerBound..<upperBound].link = URL(string: "\\(positionScheme)://\\(transcriptionRange.position)")
- Use OpenURLAction to complete the relocation operation
List(0..<store.transcriptions.count, id: \.self) { index in
   ...
}
.environment(\.openURL, OpenURLAction { url in
    switch url.scheme {
    case positionScheme:
        if let host = url.host(), let position = Int(host) {
            store.scrollToPosition(position)
        }
        return .handled
    default:
        return .systemAction
    }
})

@MainActor
func scrollToPosition(_ position: Int) {
    if position >= 0, position < count - 1 {
        self.currentPosition = position
    }
}
Creating a search bar with excellent user experience
- Use safeAreaInset to add the search bar
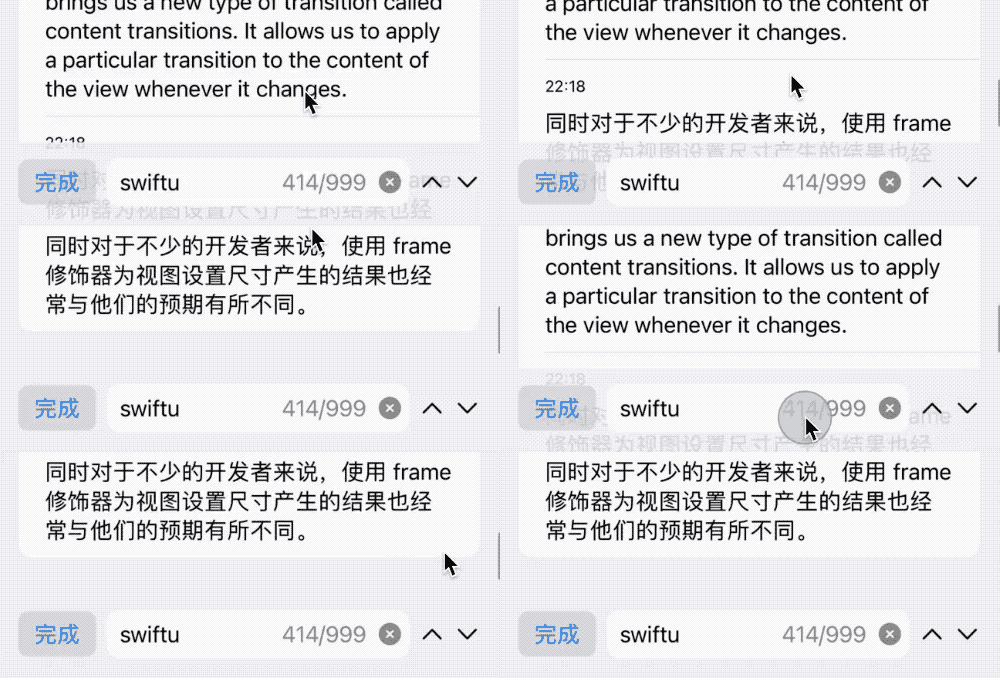
When there is no safeAreaInset modifier, we usually add the search bar in two ways - 1. By placing the search bar below the List using VStack, 2. By using overlay to place the search bar on top of the List view. However, if we use the overlay method, the search bar will block the bottommost record of the List. By using safeAreaInset, we can set the area of the search bar to the safe area below the List. This way we can achieve a Tab-like effect while not covering the bottommost data of the List.
- When the search bar appears, use @FocusState to automatically give focus to the TextField, which will open the keyboard.
@FocusState private var focused: Bool
TextField("查找", text: $store.keyword)
    .focused($focused)
    .task {
        focused = true
    }
Reduce Performance Burden Caused by Real-Time Search
In the current case, real-time response to keywords and searching can cause a significant performance burden. We need to use the following methods to avoid application lag caused by this:
- Ensure that search operations run in the background thread
- Filter keyword response to avoid invalid search operations due to fast input
We usually use .subscribe(on:) in Combine to set the operator operation thread. In the sample code, I used the method introduced in the article “Combining Combine and async/await” to embed async/await methods in the Combine operation pipeline through custom Publishers to achieve the same effect.
public extension Publisher {
    func task<T>(maxPublishers: Subscribers.Demand = .unlimited,
                 _ transform: @escaping (Output) async -> T) -> Publishers.FlatMap<Deferred<Future<T, Never>>, Self> {
        flatMap(maxPublishers: maxPublishers) { value in
            Deferred {
                Future { promise in
                    Task {
                        let output = await transform(value)
                        promise(.success(output))
                    }
                }
            }
        }
    }
}

public extension Publisher where Self.Failure == Never {
    func emptySink() -> AnyCancellable {
        sink(receiveValue: { _ in })
    }
}

cancellable = $keyword
    .removeDuplicates()
    .throttle(for: .seconds(0.1), scheduler: DispatchQueue.main, latest: true)
    .task(maxPublishers: .max(1)) { keyword in
        await self.search(keyword: keyword)
    }
    .emptySink()
Meanwhile, by using flatMap(maxPublishers: .max(1)), removeDuplicates, and throttle, the number of searches that can be performed within a unit of time is further limited to ensure the smoothness of the application.
Summary
The sample code did not deliberately create a standardized data flow, but because of the separation of views and data, it is not difficult to rewrite it into any data flow method you want to use.
Although only partial optimizations were made to performance in two places, searching and injecting TranscriptionRow views, the final smoothness has basically met the requirements, which indirectly proves that SwiftUI has considerable practical ability.